The Users page is the client list of the panel — every account that can order, hold balance or call the API. This guide walks through the whole page on the live admin (smmpanelz.com/go-admin/clients).
Reading the screenshots. Blue numbered badges mark the thing you click, in order. Blue boxes mark a data value worth looking at. Real names are replaced by readable placeholders in the panel's own font — Provider 1, Service 3, [email protected] — so the layout and the click are exactly as they appear in your admin, and nothing about a real client is exposed.
Page anatomy
Three bands: the toolbar (create + search), the table with its status filter, and the row itself — every client action hangs off the Actions button at the end of the row.
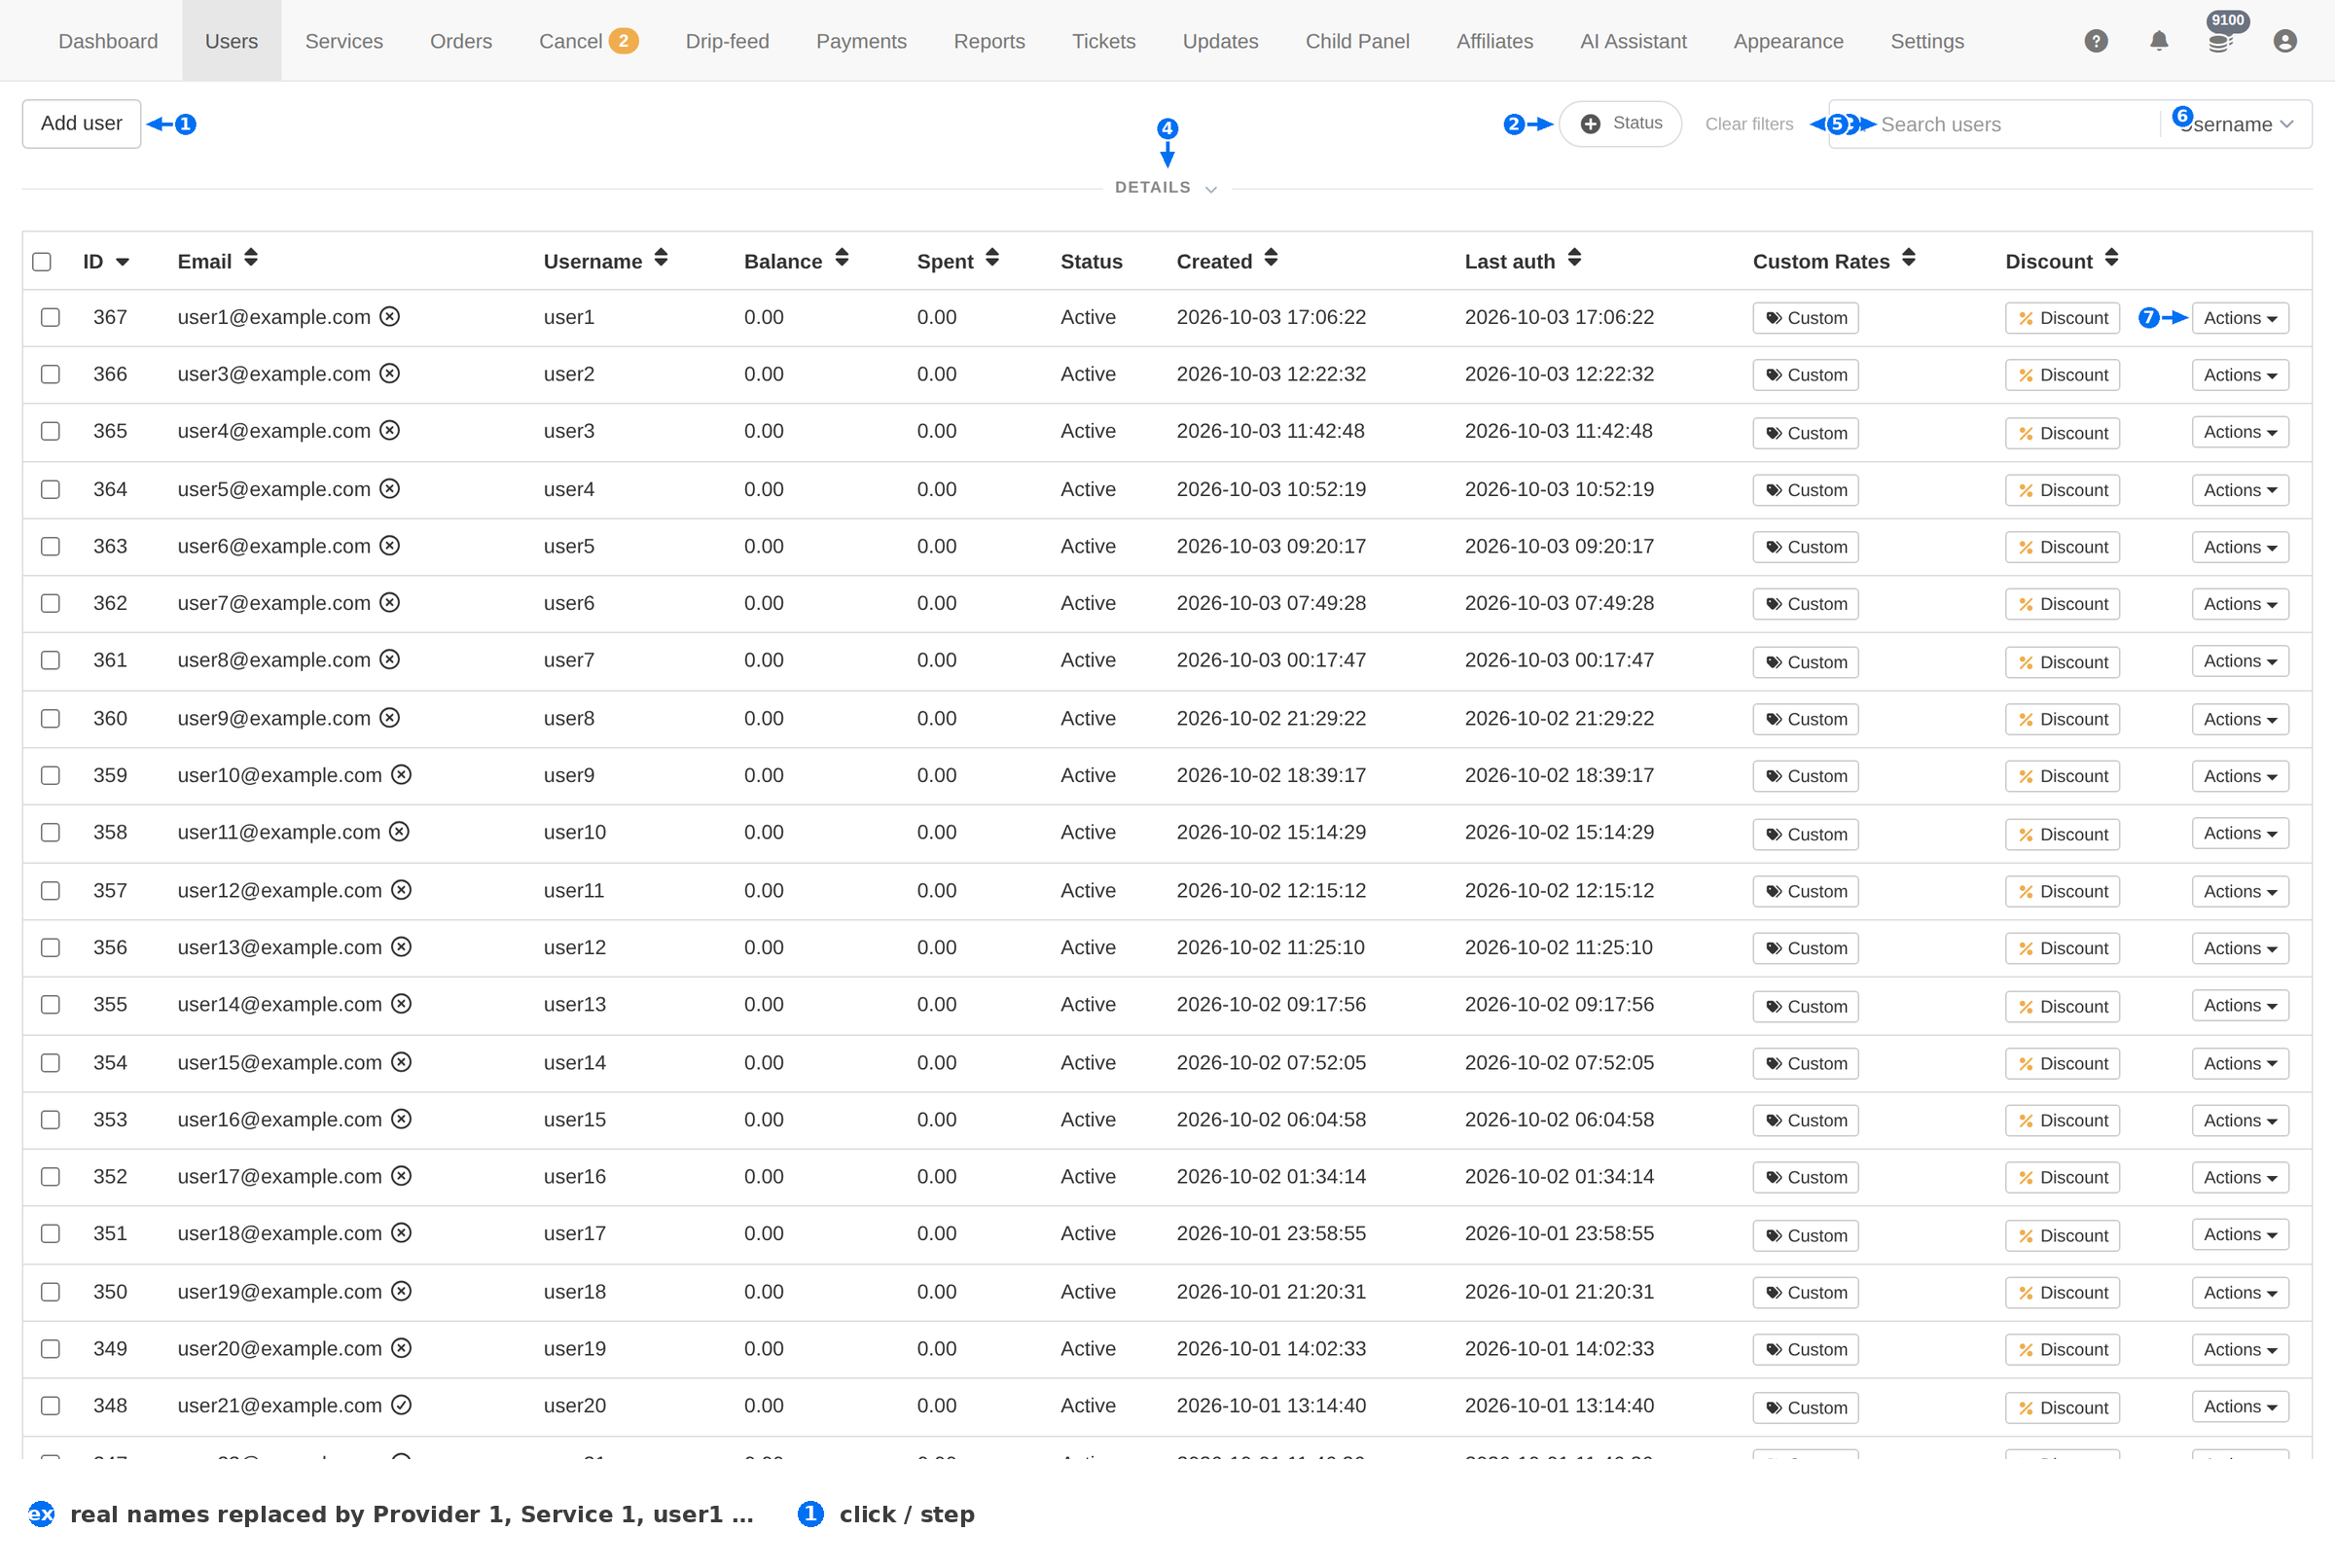
| # | Element | What it does |
|---|---|---|
| 1 | Add user | Creates a client account by hand. See Add a user. |
| 2 | Status filter | Filters the list by account status; the number in brackets is how many filters are on. |
| 3 | Clear filters | Resets the status filter and returns the full list. |
| 4 | Details | Opens the account totals — total users, confirmed emails, balances. |
| 5 | Search | Looks a client up. See Search & filters. |
| 6 | Search field | Chooses which column the search matches: ID, Username, Name, Email, Phone, Skype or WhatsApp. |
| 7 | Custom | Per-client prices for this client only (the Custom Rates column). |
| 8 | Discount | The bulk discount this client gets on every order. |
| 9 | Actions | Everything else you can do to the client. See Row actions. |
Column reference
| Column | Meaning | Notes |
|---|---|---|
| ID | The client's permanent number. | Sortable. Quote it in support tickets — it is the only unambiguous identifier. |
| Login and contact address. | Followed by the confirmation state icon — see Email verification. | |
| Username | Login name. | Long names are truncated in the cell. |
| Balance | Credit the client can spend. | Money you hold for the client — a liability, not profit. |
| Spent | Total the client has ordered for. | High spend with a low balance = an active reseller. |
| Status | Account state: Active, Suspended, Unconfirmed, Malicious. | The header doubles as the filter. Not the same as email confirmation. |
| Created | Signup date. | Sort ascending to find your oldest clients. |
| Last auth | Last successful sign-in. | An old date on an Active account means a dormant client. |
| Custom Rates | Per-service prices for this client. | Opened with the Custom button in the row. |
| Discount | Bulk discount applied to every order. | Opened with the Discount button in the row. |
| Actions | Per-client menu. | Items change with the client's state. |
Details & totals
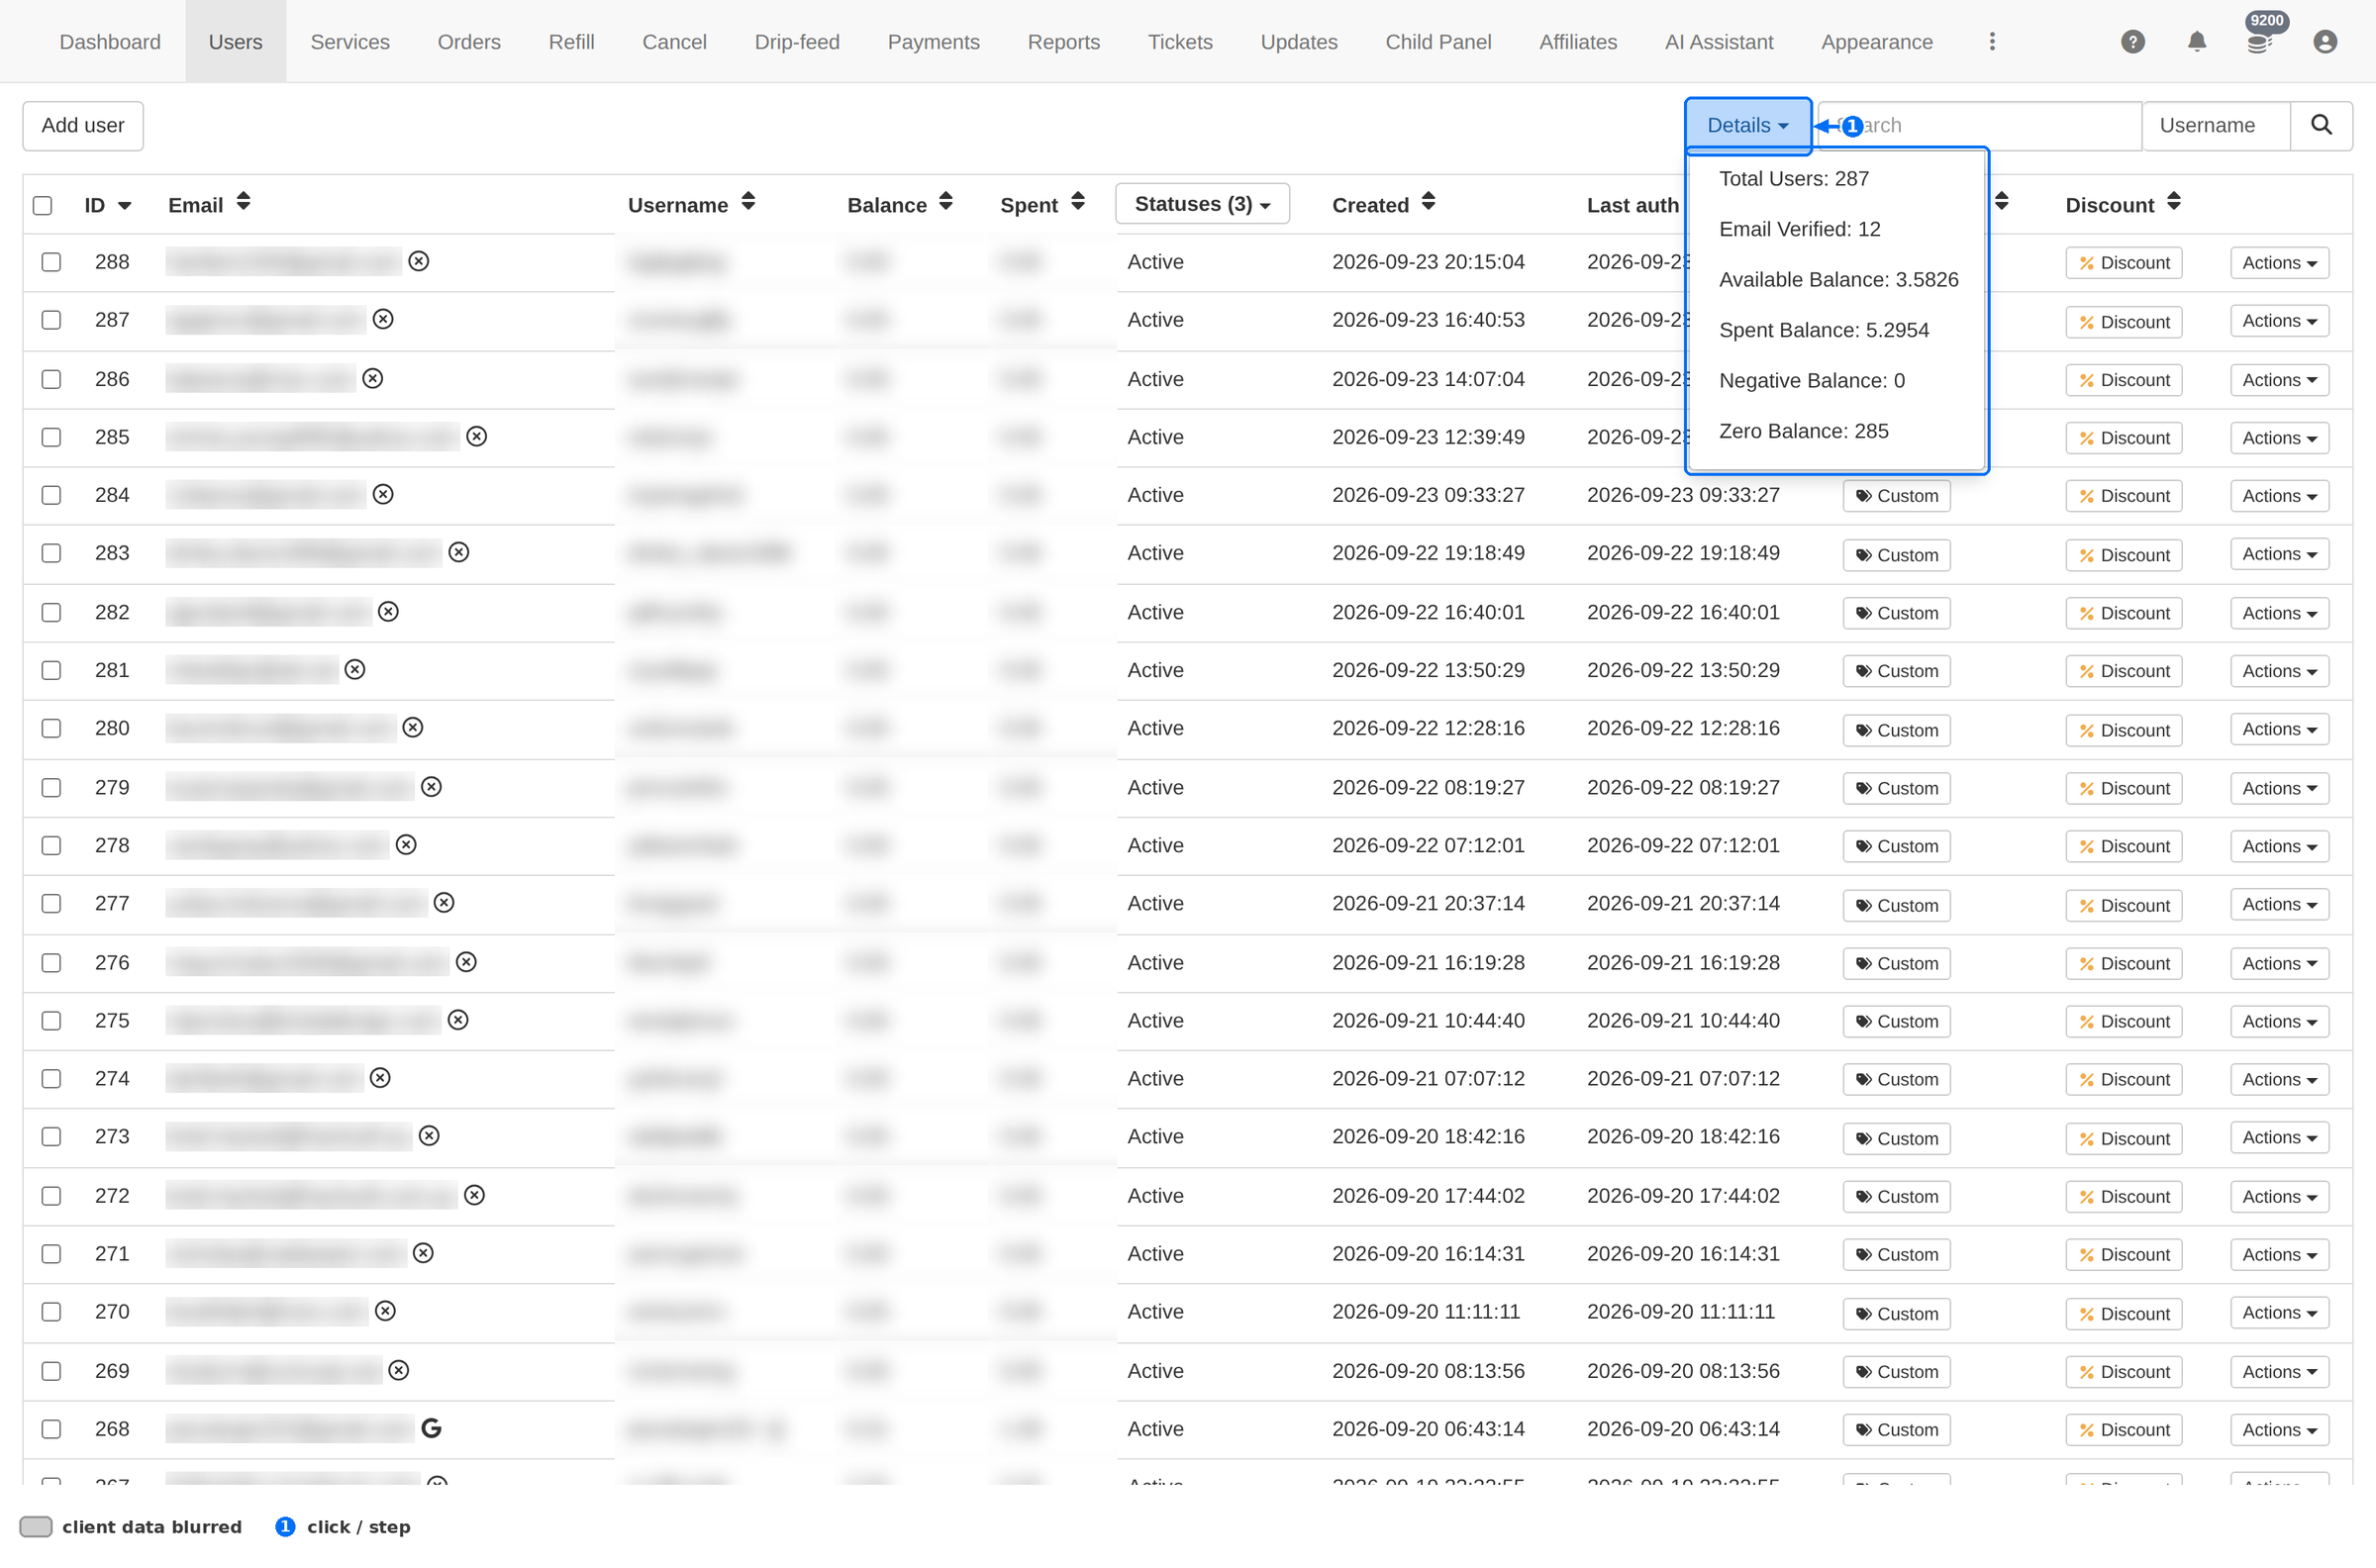
| Number | What it tells you |
|---|---|
| Total Users | How many client accounts exist. |
| Email Verified | How many of them actually confirmed their address — usually a small slice, so treat it as a to-do list. |
| Available Balance | Money sitting in client wallets. This is the money you owe in services. |
| Spent Balance | What clients have ordered for in total. |
| Negative Balance | Clients who owe you — usually caused by a refund or a manual correction. |
| Zero Balance | Clients with nothing to spend; the biggest group in a young panel. |
Search & filters
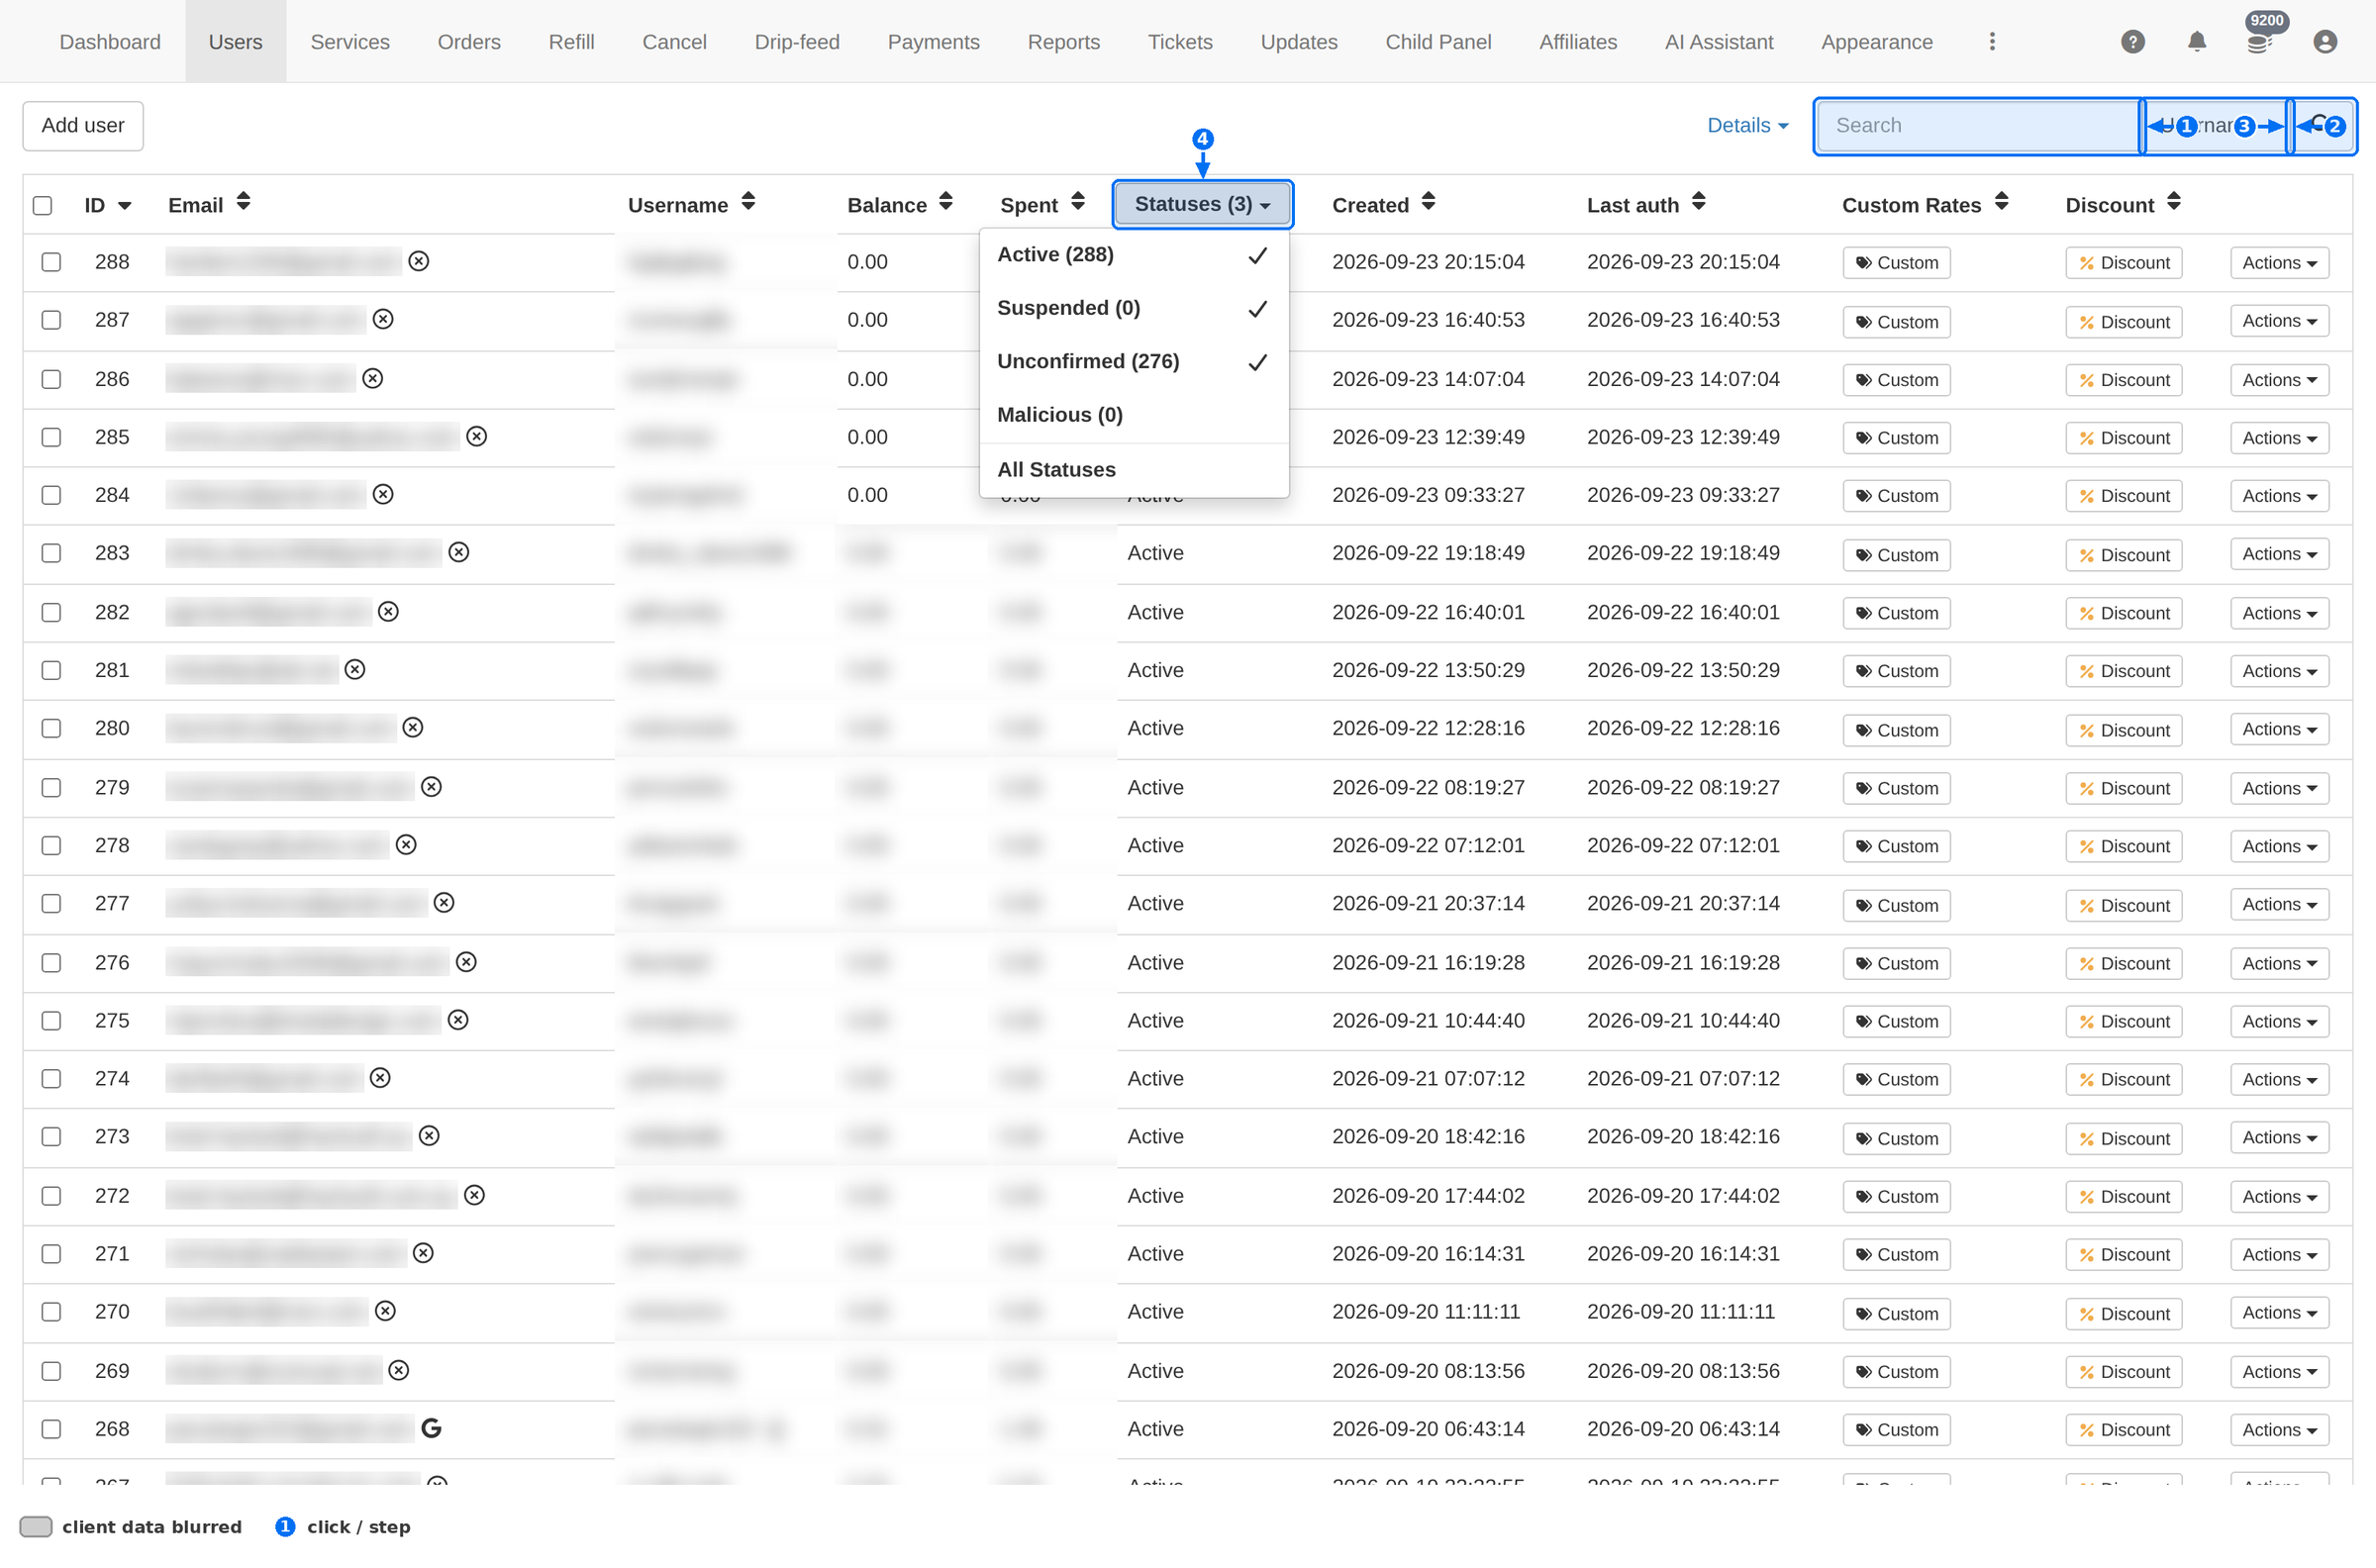
- Pick the field. ID for an exact hit, Email or Username when the client wrote to support, Phone, Skype or WhatsApp when you only have their contact handle.
- Type and submit. The magnifier button or Enter runs it.
- Filter by status. Open the status filter and tick a state. The counts next to each entry tell you the size of the problem before you click.
- Reset. Tick All … to go back to the full list, or press Clear filters.
An active status filter is the usual reason a client "disappears". Before you look for a missing account, check the filter button — if it shows a number in brackets, the list is filtered.
Add a user
- Click Add user in the top-left of the toolbar.
- Email. Required. This is the login and where every panel mail goes — a typo here means the client never receives anything.
- Username. Required. The name the client types at login.
- Password. Required. Set one and hand it over, or let the client change it later.
- Debt Status. Leave it off for a normal client. It marks the account as owing money, which blocks new orders until it is cleared.
- Email Verified. Switch it on if you already know the address is good.
- Register. The client appears at the top of the list with the highest ID.
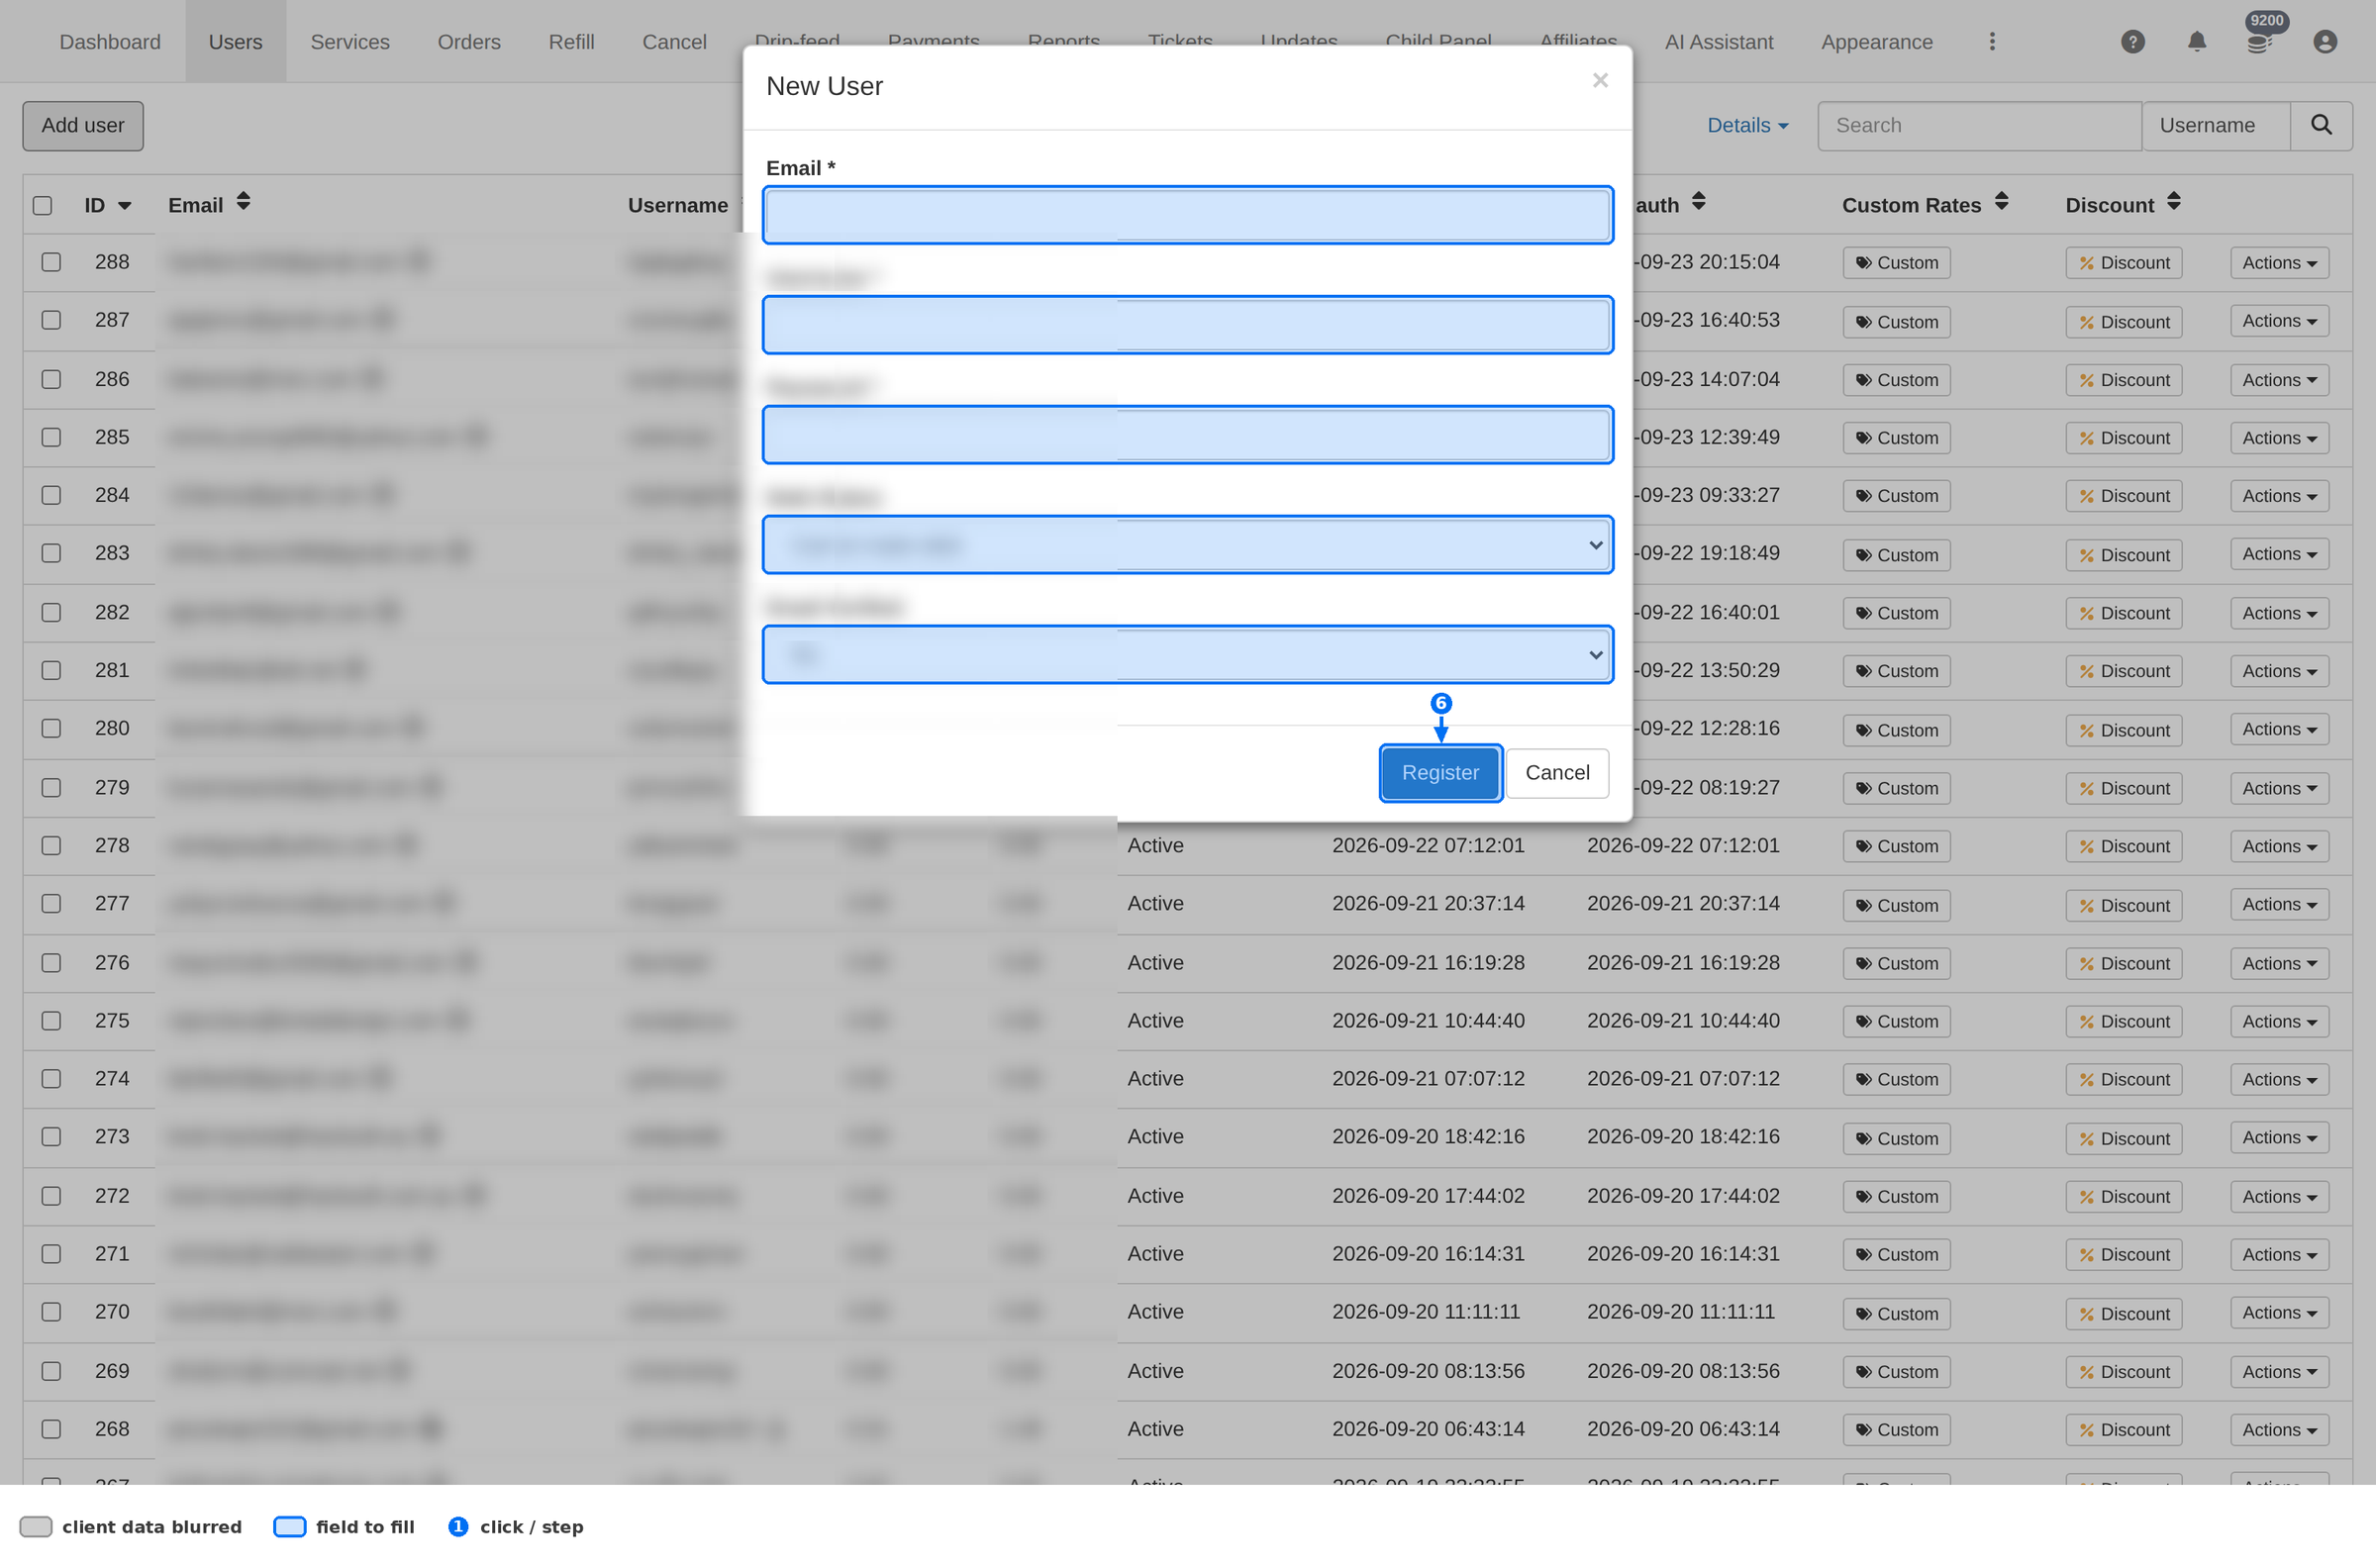
| Field | Required | What to put |
|---|---|---|
Email * | Yes | A working address. Confirmation and password-reset mails go here. |
Username * | Yes | Unique login name, no spaces. |
Password * | Yes | Give it to the client over a channel you trust. |
| Debt Status | No | Off for normal clients. On = the account is flagged as owing money. |
| Email Verified | No | On = skip the confirmation mail and mark the address confirmed immediately. |
Email verification
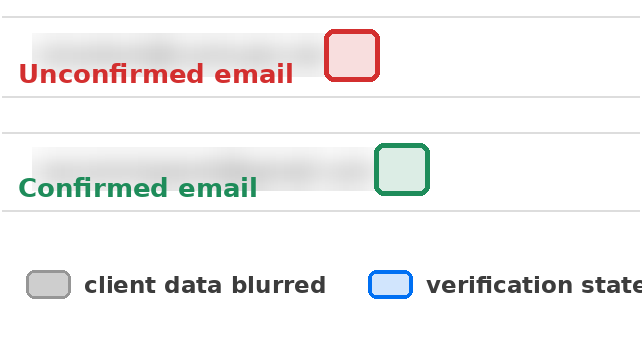
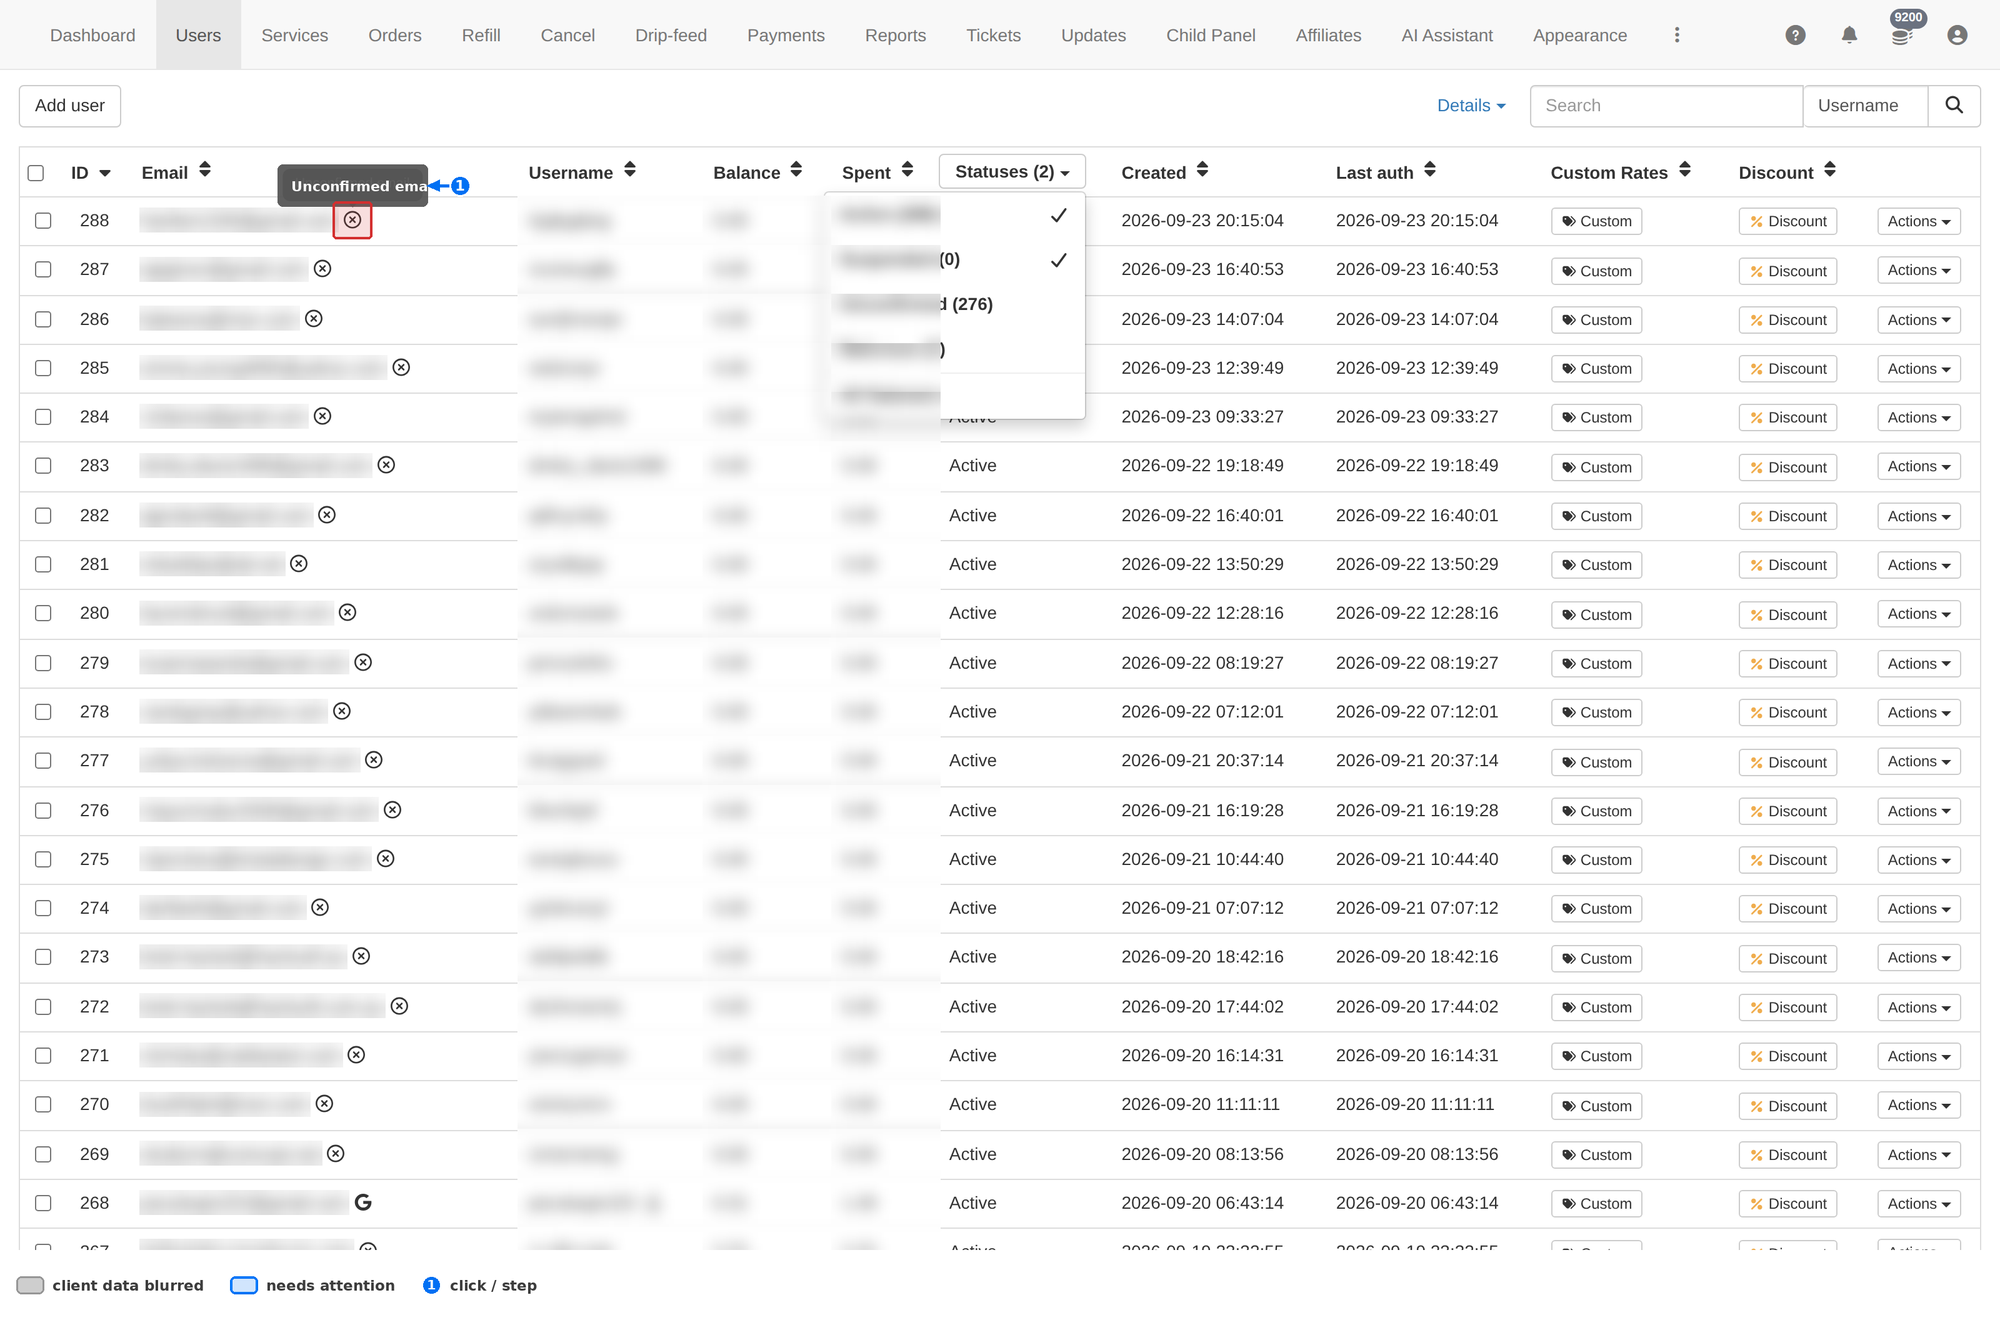
| Icon | Tooltip | Meaning |
|---|---|---|
| Confirmed email | The client clicked the link in the confirmation mail. | |
| Unconfirmed email | Signed up, never confirmed. The account can still be Active. | |
| Signed up with Google | Verified by Google — no confirmation mail needed. |
Account status and email confirmation are two different things. A client can be Active — ordering, spending, using the API — with an unconfirmed email. Do not suspend an account just because the email icon is unconfirmed; check the Status column first.
How to confirm a client's email
- Filter the list. Status → Unconfirmed to see the accounts waiting on this.
- Open the client. Row Actions → Edit user.
- Switch Email Verified on and press Update.
- Or fix the address. If the address itself is wrong, correct the Email field in the same dialog and then confirm it.
Edit a user
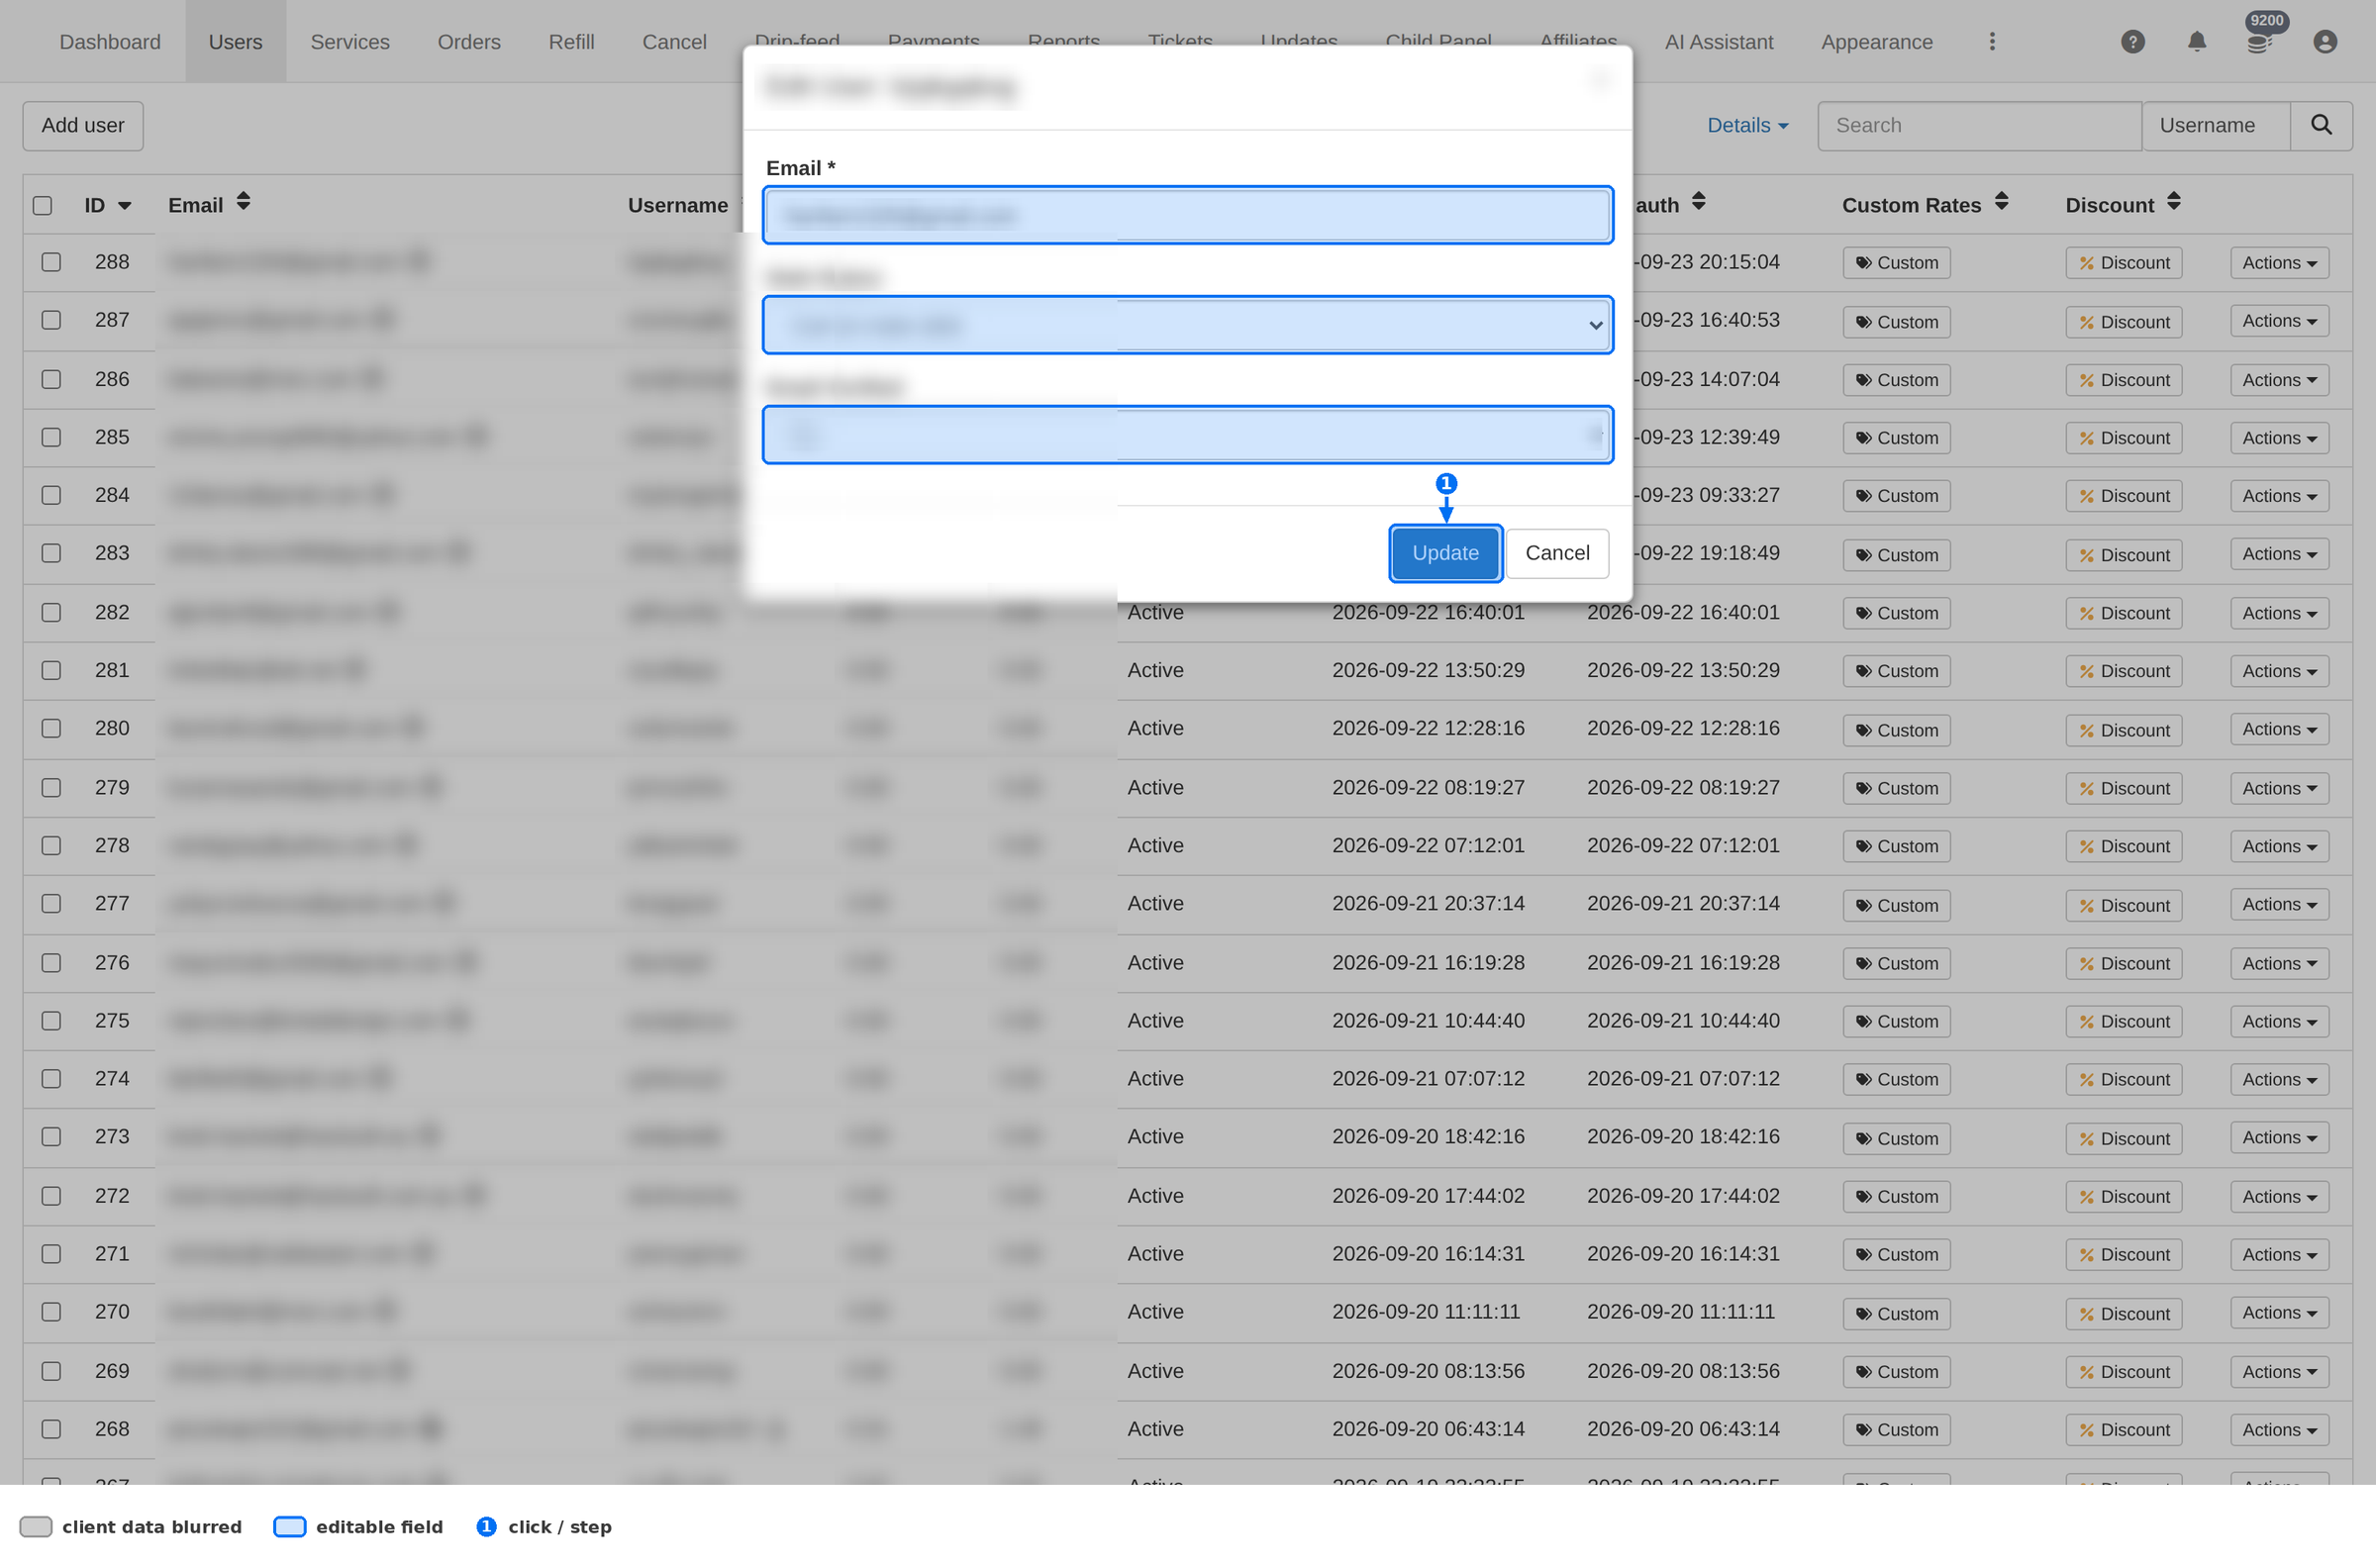
| Field | What it changes |
|---|---|
| The login and contact address. Changing it does not touch existing orders. | |
| Debt Status | Flags the account as owing money, or clears the flag. |
| Email Verified | Confirms (or un-confirms) the address without any mail. |
Nothing is saved until you press Update. Closing the dialog with Cancel or Esc discards your edits.
Set a password
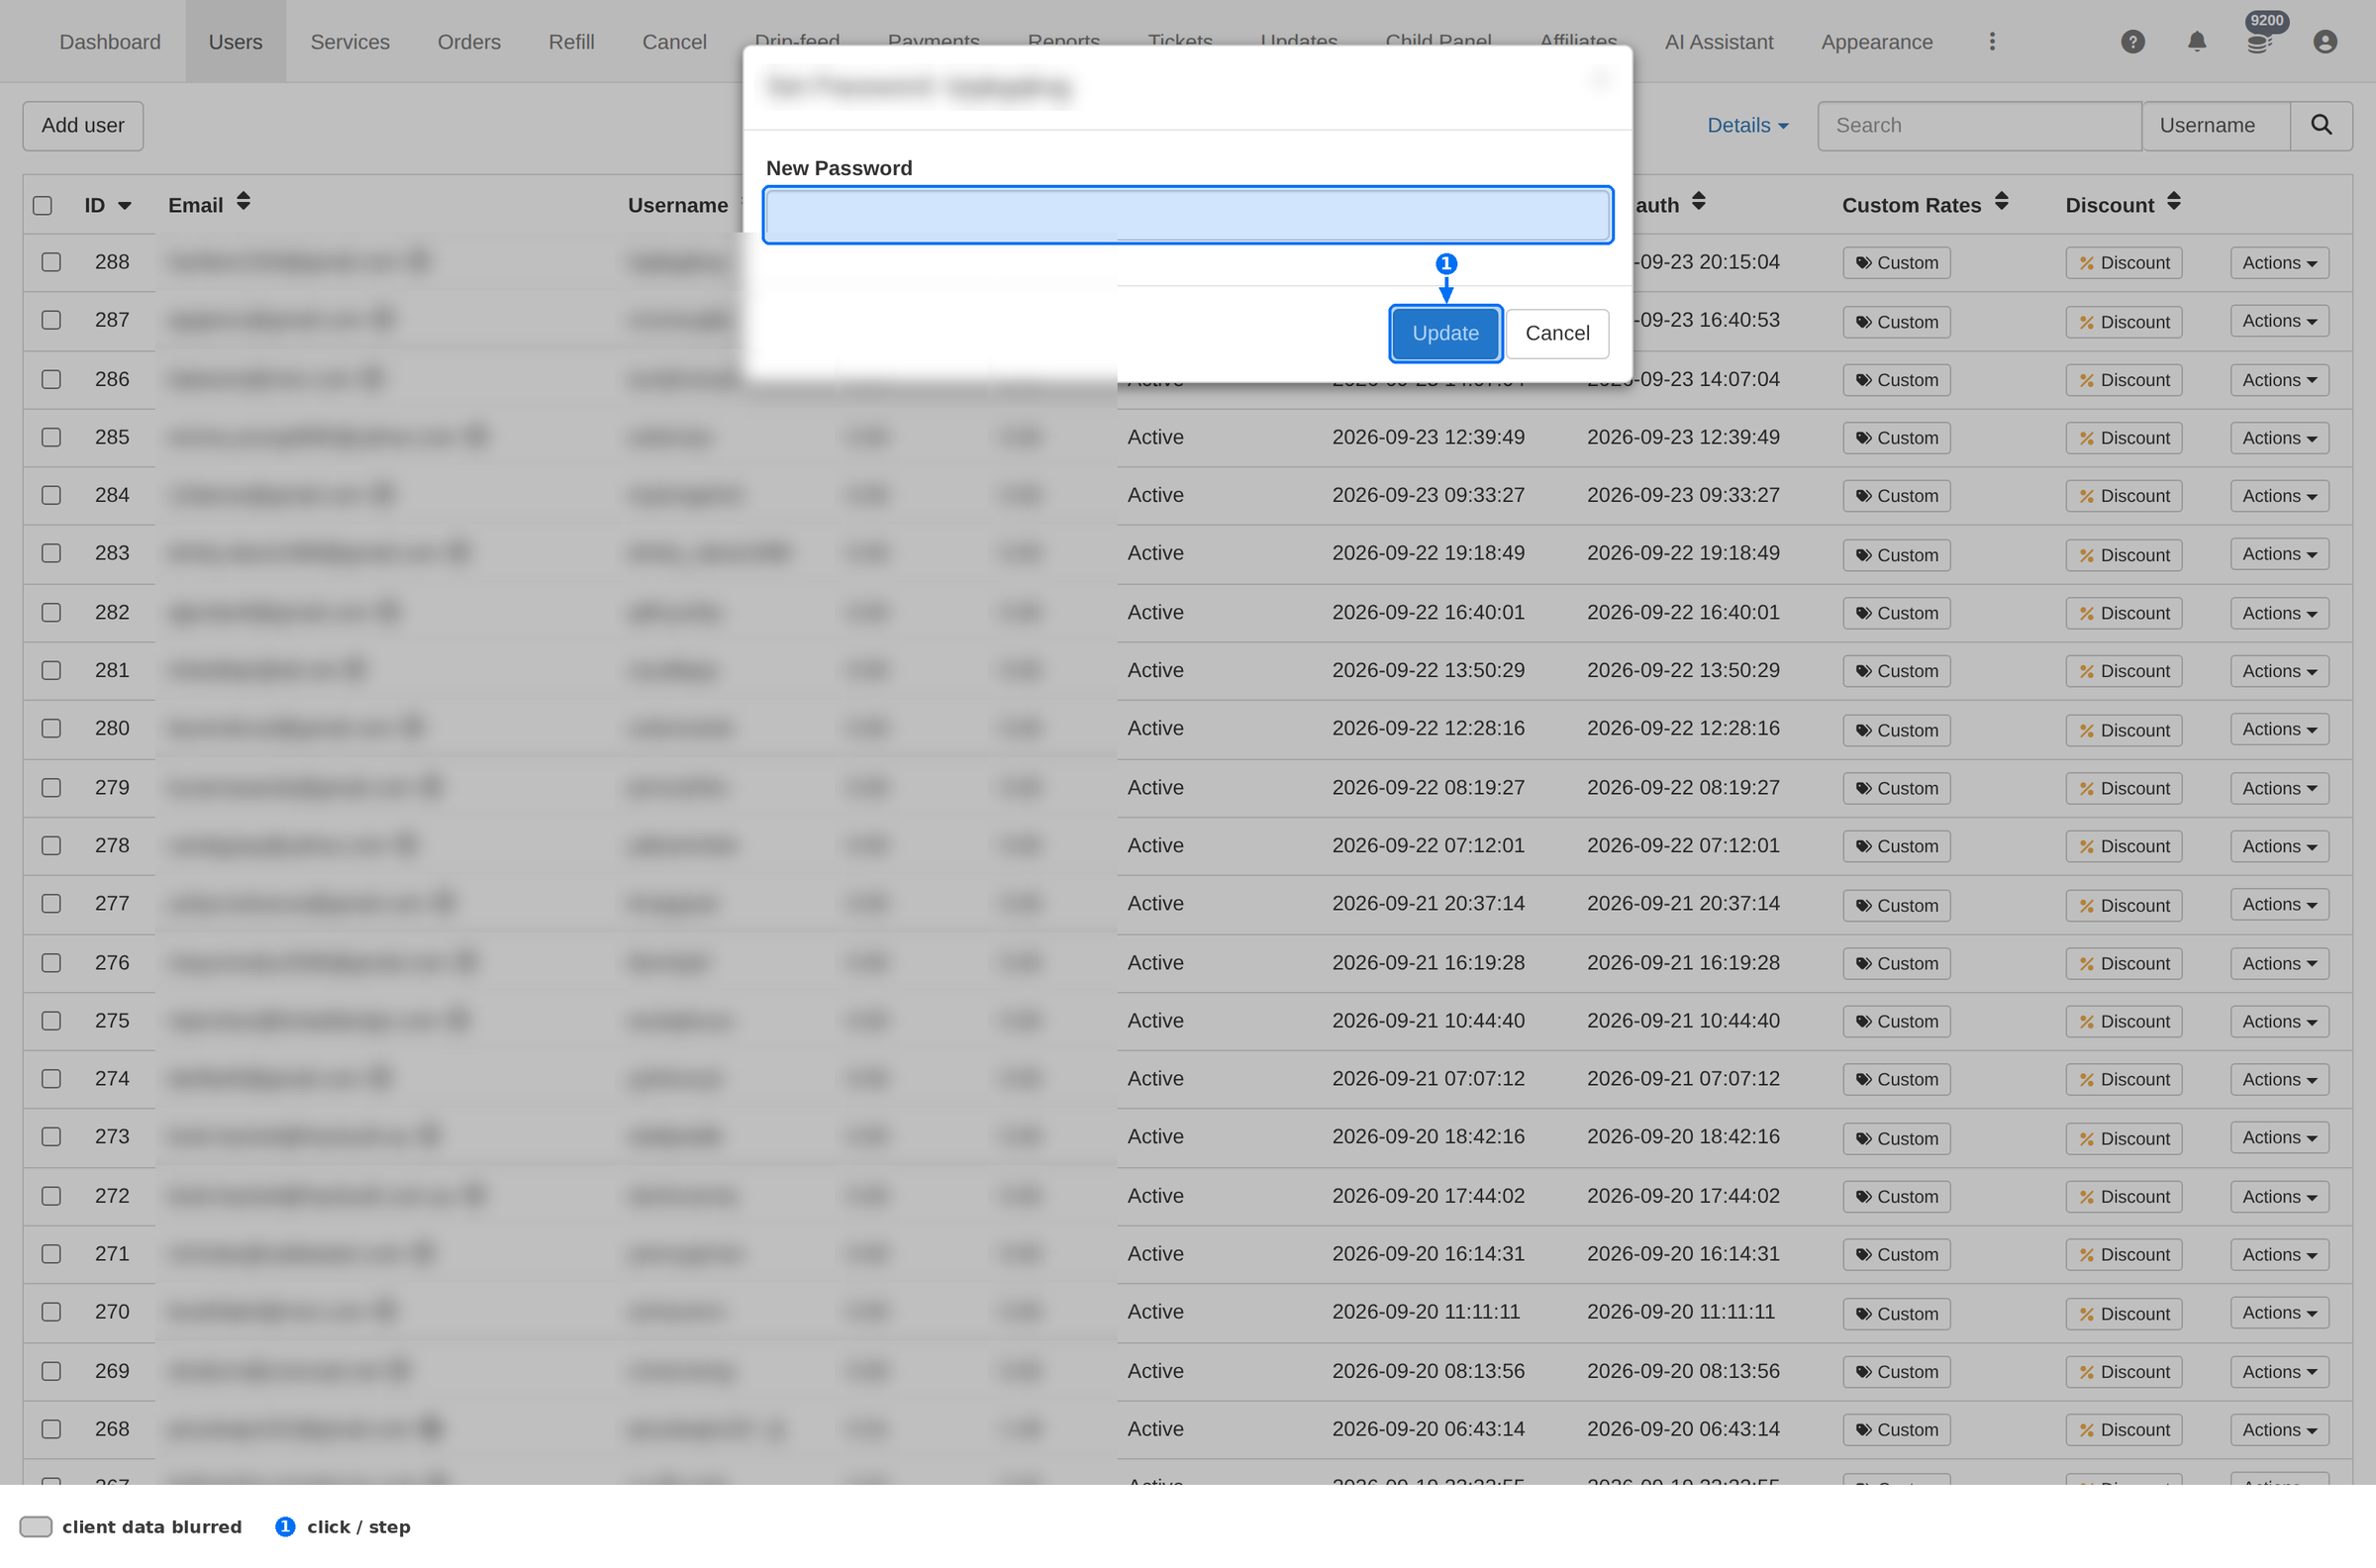
- Row Actions → Set password.
- Type the new password in the New Password field.
- Update. Hand the password to the client over a channel you trust.
Row actions
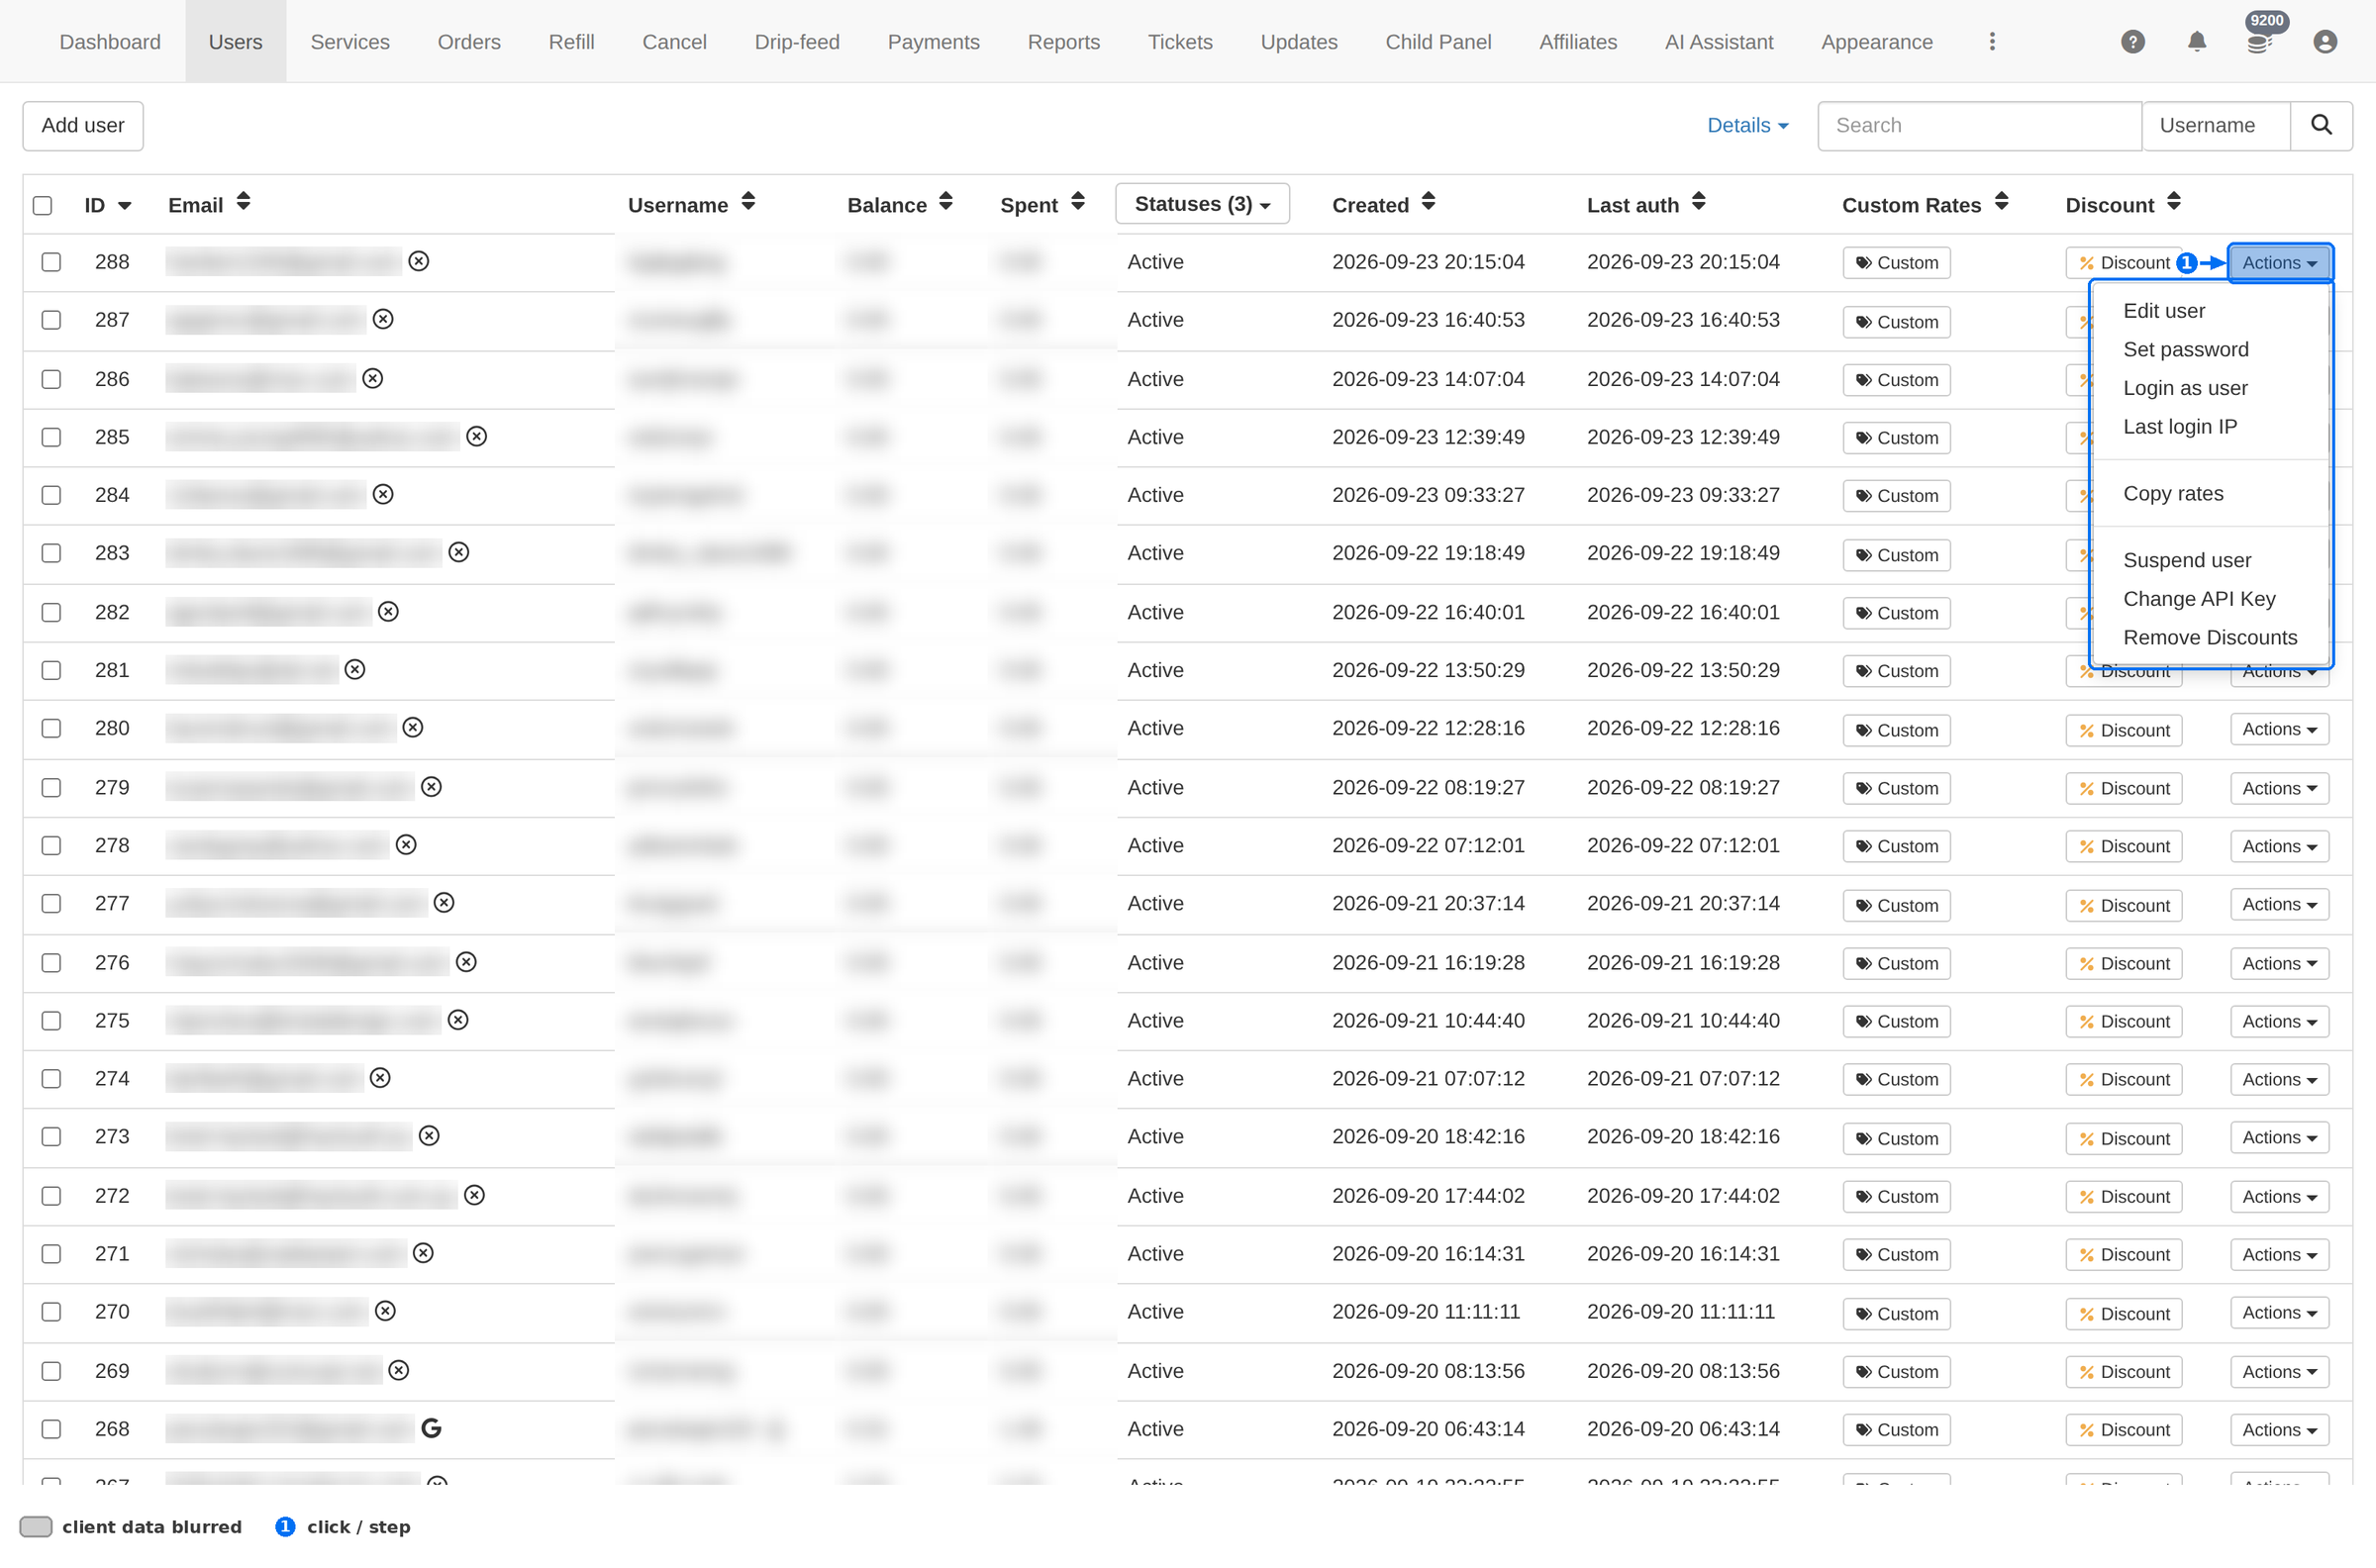
| Action | When you use it |
|---|---|
| Edit user | Change the email, the debt flag or the email-confirmed state. |
| Set password | Client locked out, or you want to force a re-login. |
| Login as user | Open the client's own dashboard to reproduce exactly what they see. Use it for support, not for changes you can make from here. |
| Last login IP | Where the last session came from — the first thing to check on an account-abuse report. |
| Copy rates | Copy another client's custom rates onto this one. The fast way to set up a group of resellers. |
| Suspend user | Blocks ordering and API access without deleting anything. The right answer to a chargeback or abuse. |
| Change API Key | Rotate the client's API key when it leaked or the client asks for it. |
| Remove Discounts | Take the client back to standard pricing in one click. |
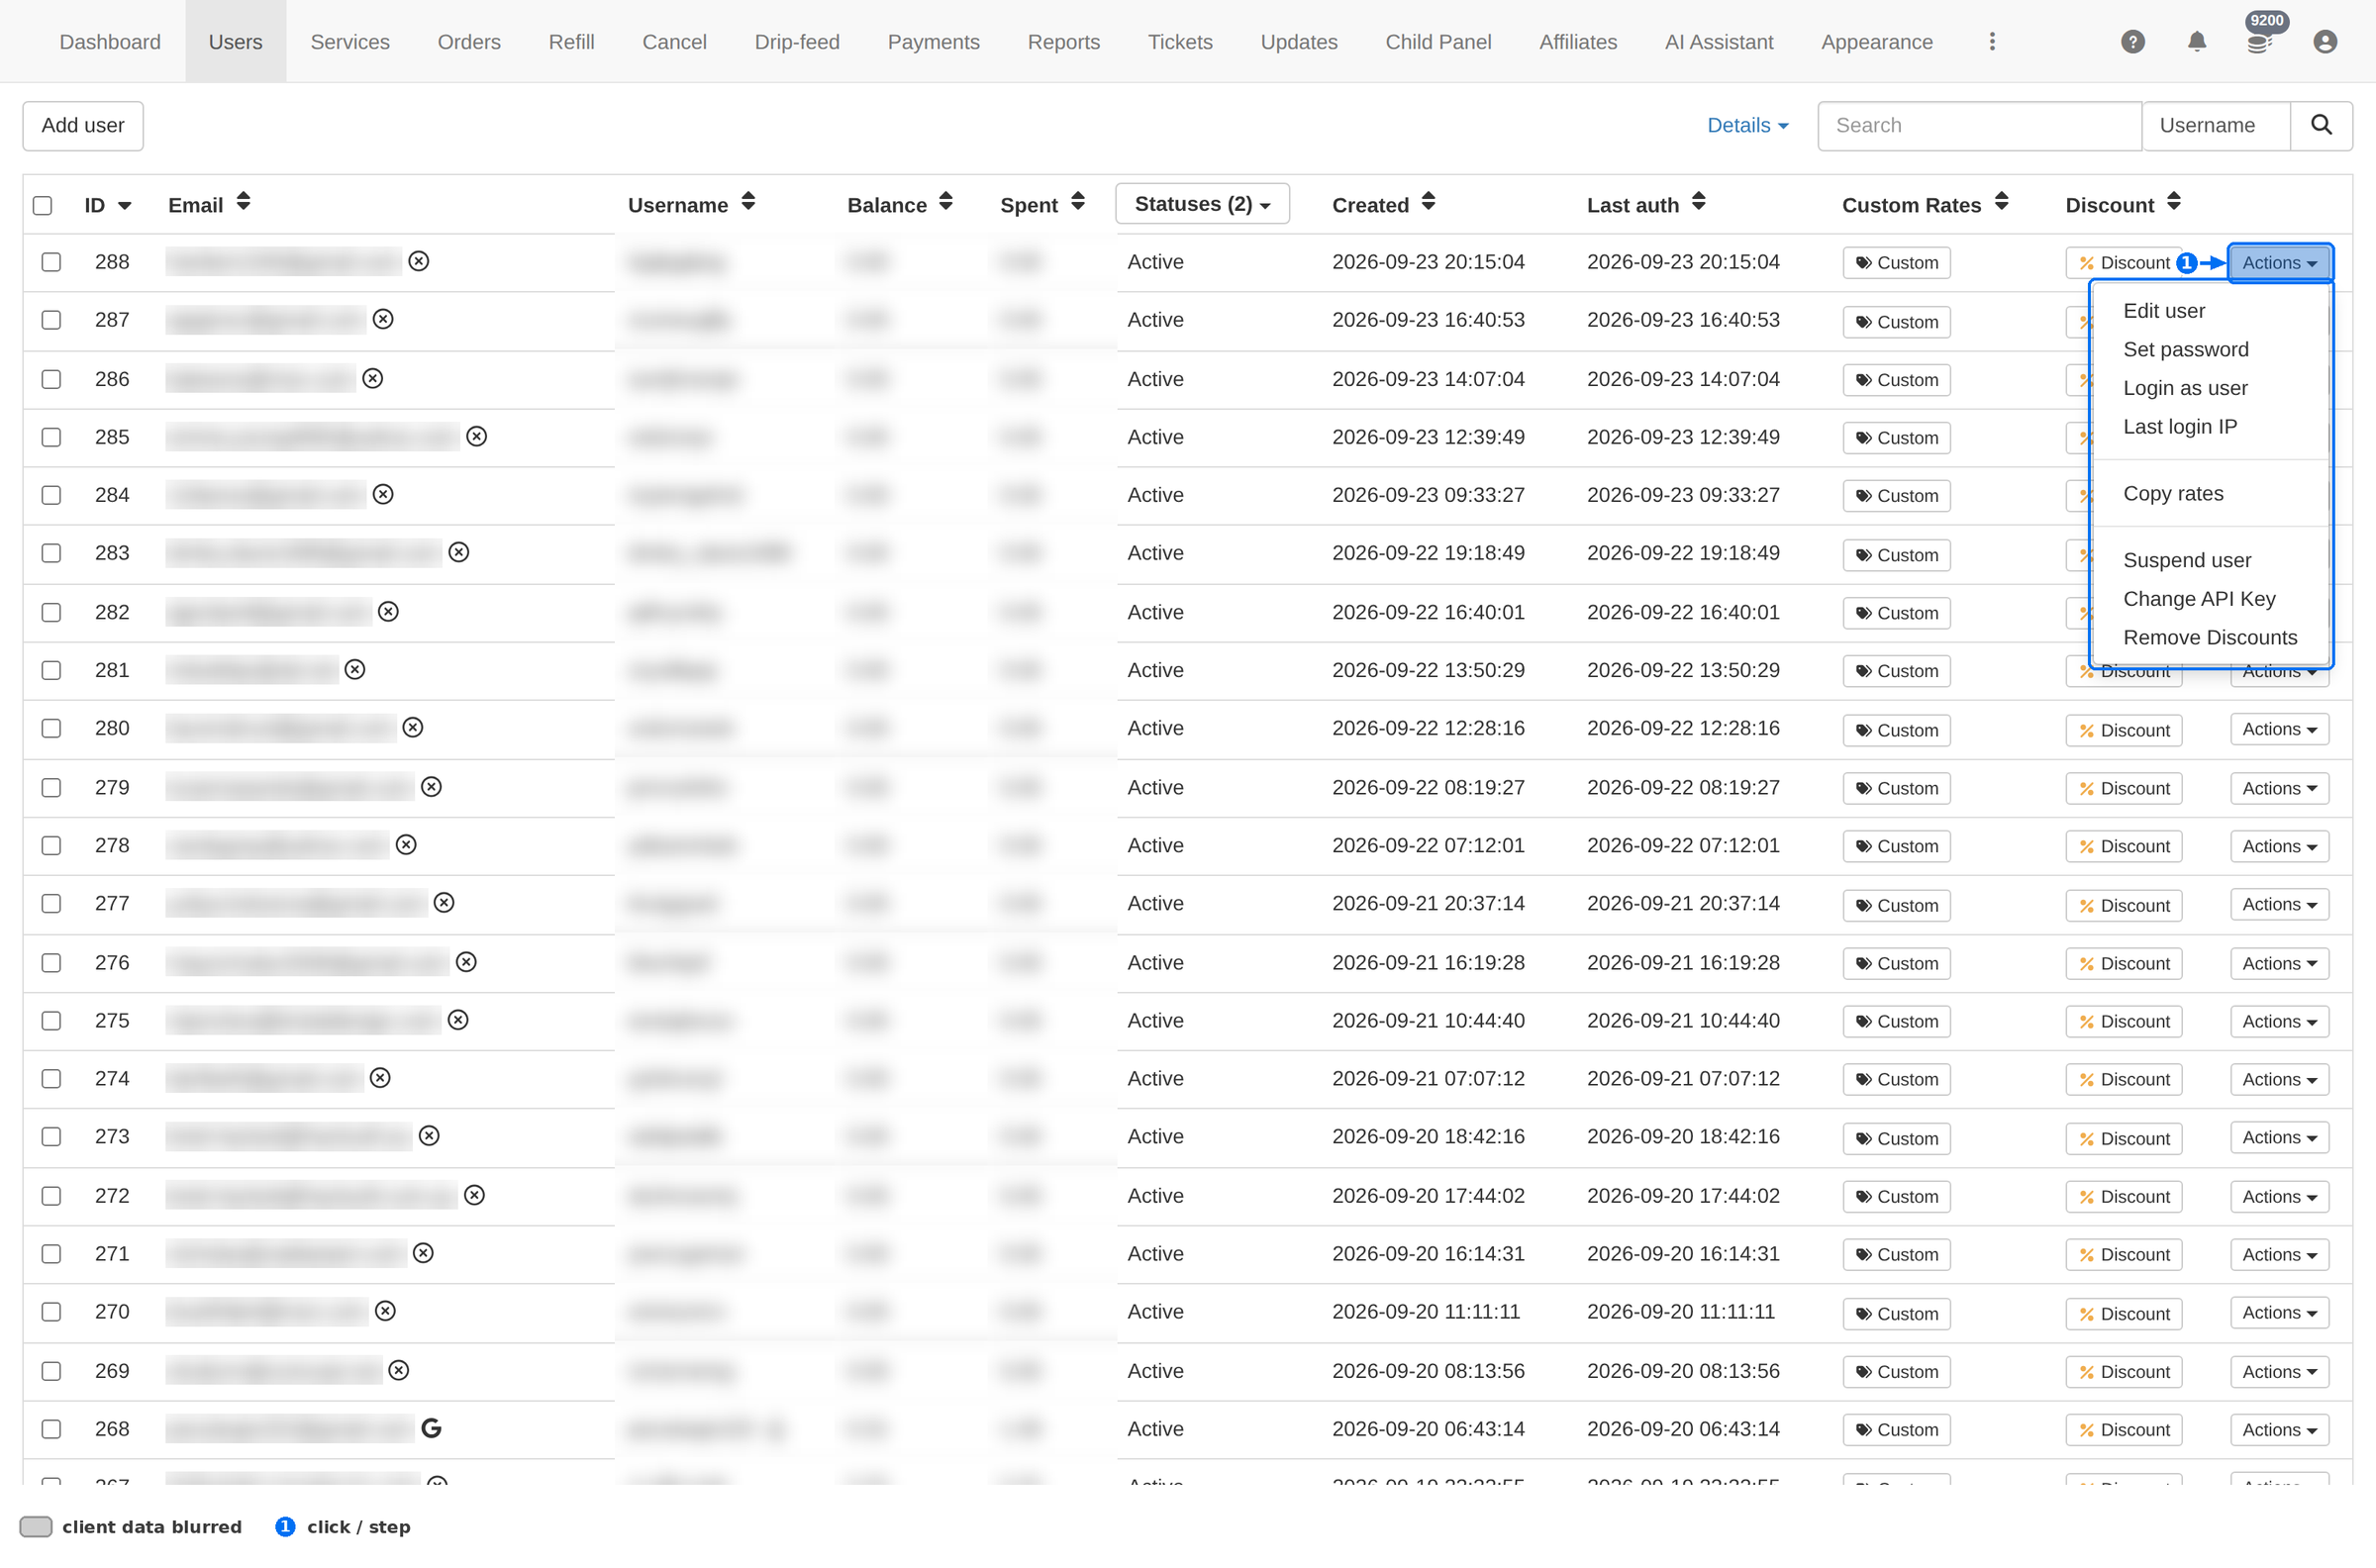
The menu adapts to the client. For a suspended account the suspend entry is the way back in; the same menu serves both states, so read it before you click.
Example: a client with an unconfirmed email
Bulk actions
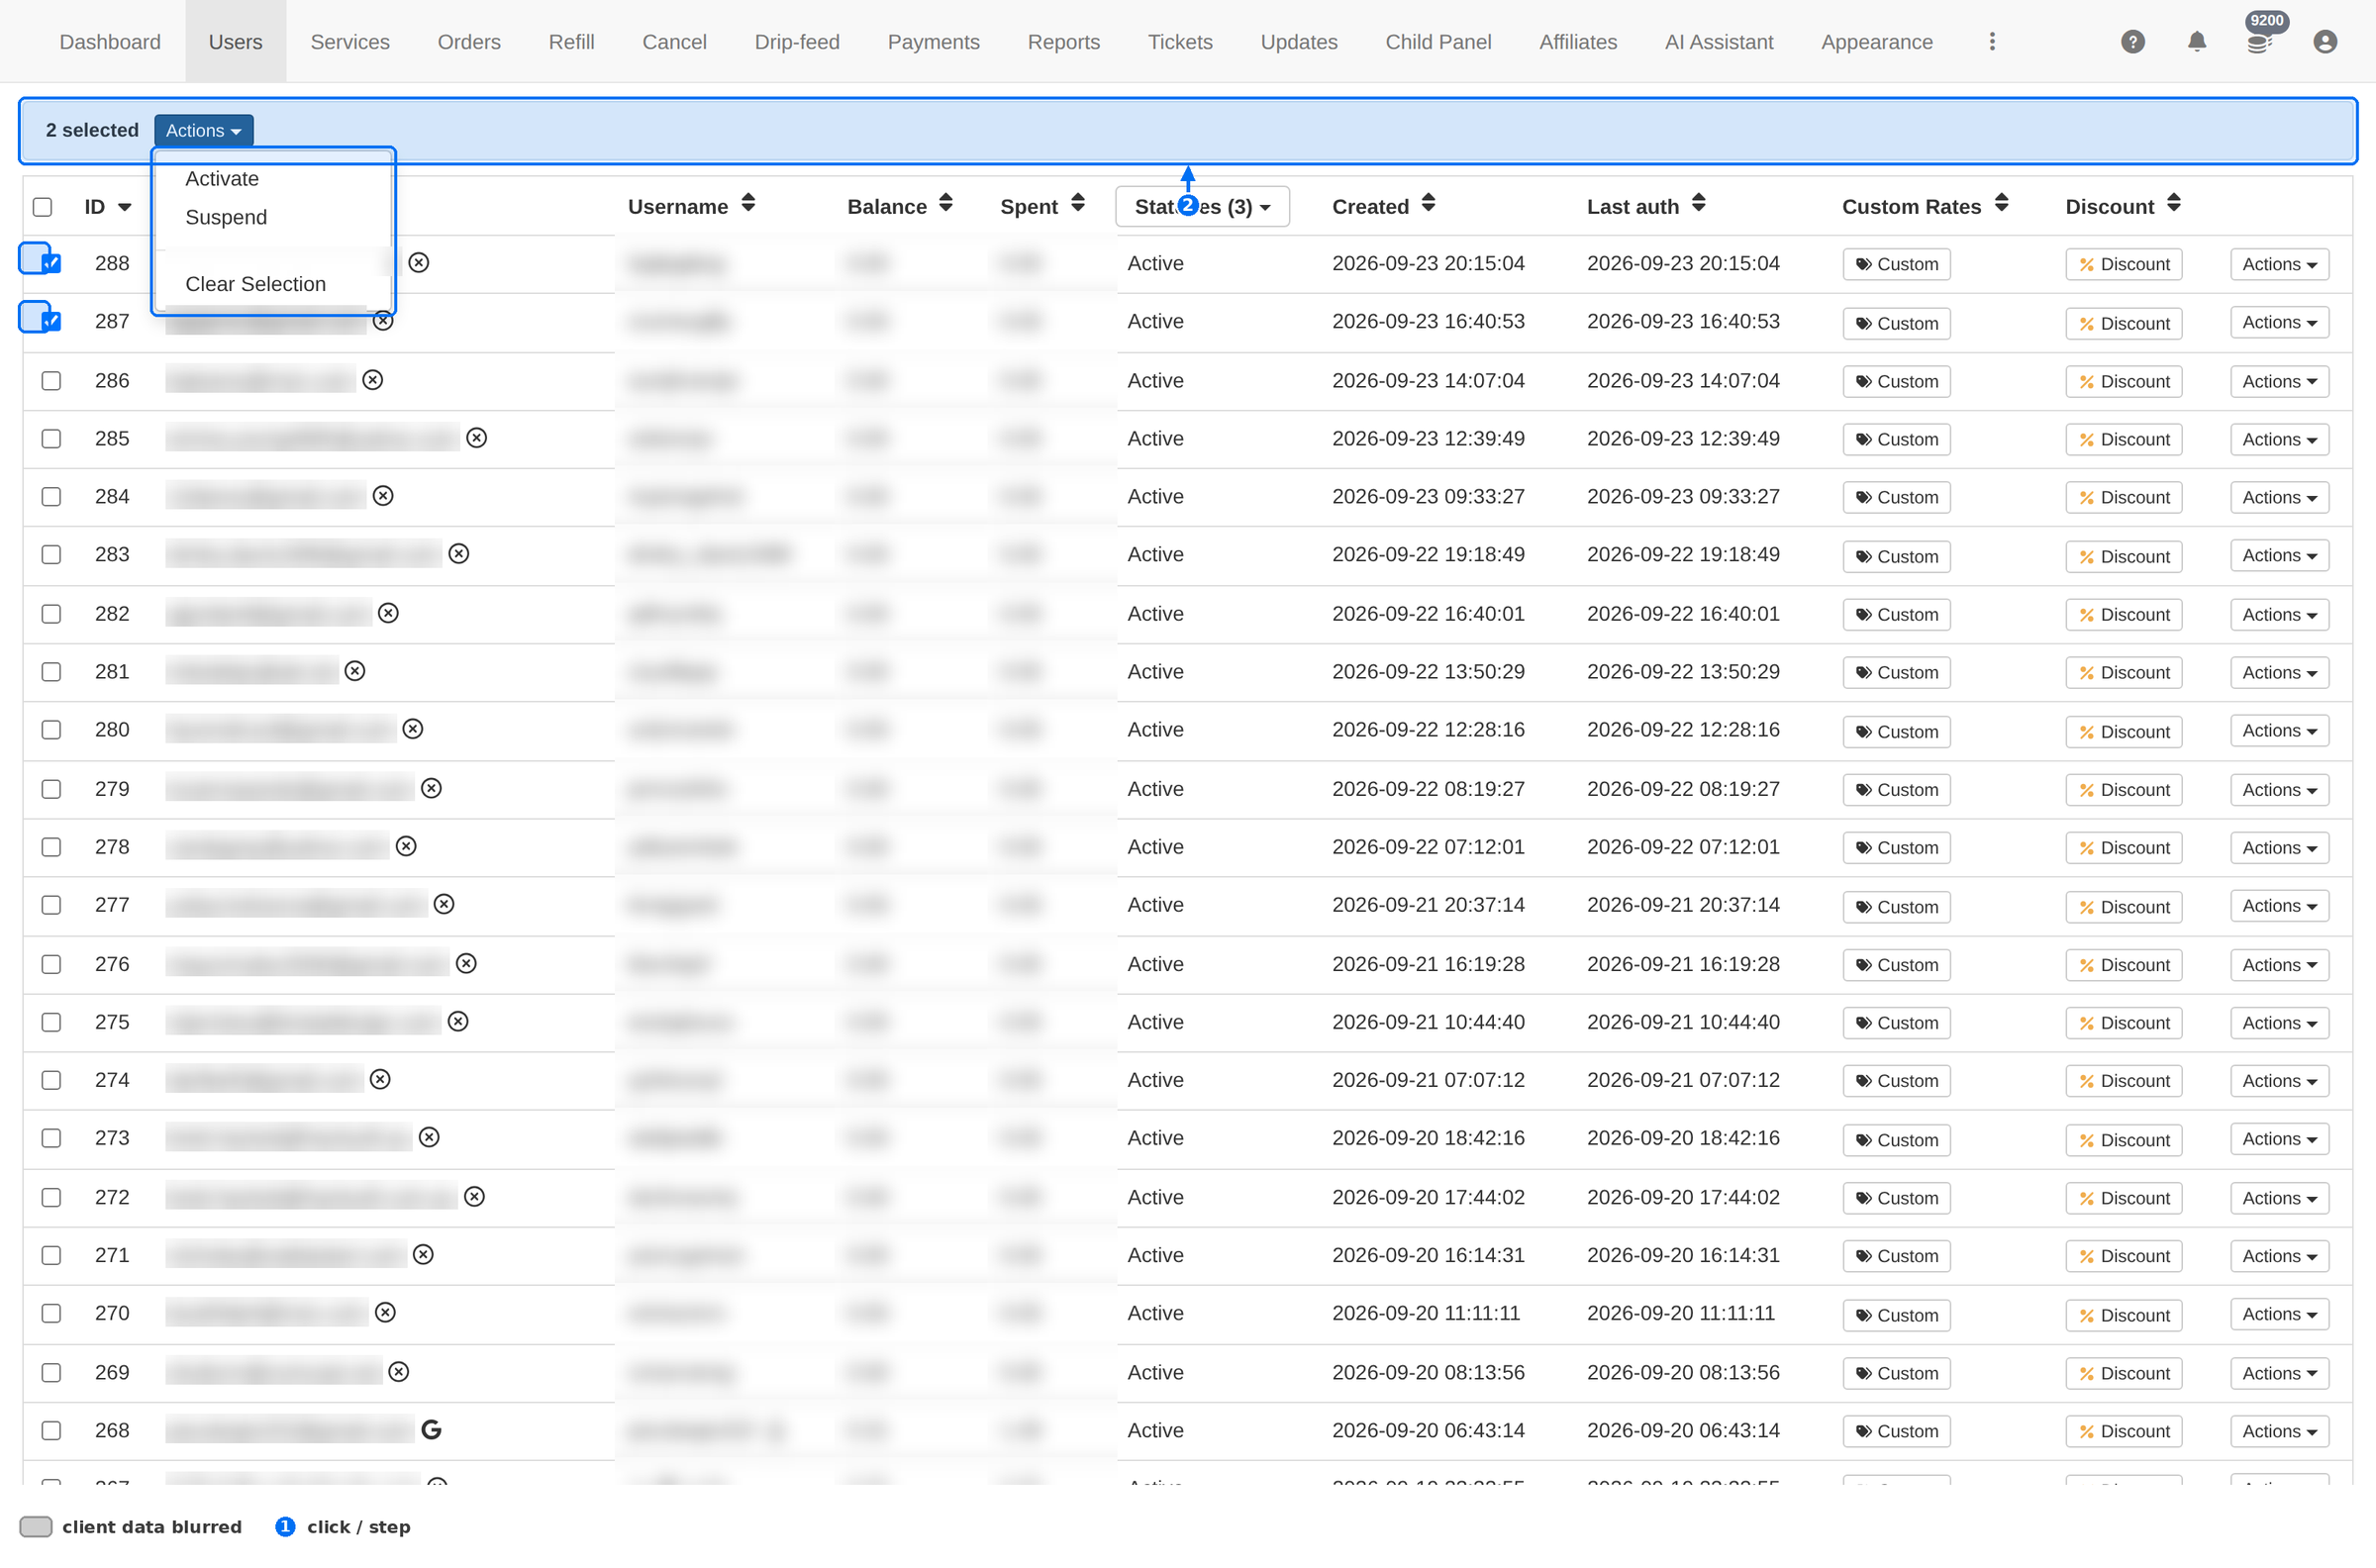
| Bulk action | Effect |
|---|---|
| Activate | Sets every selected client to Active. |
| Suspend | Blocks every selected client at once — the answer to a wave of fake signups. |
| Clear Selection | Unticks everything and brings the normal toolbar back. |
Bulk actions hit every selected row, including rows on the current page you did not scroll to. Check the counter in the bulk bar before you confirm.
On a phone
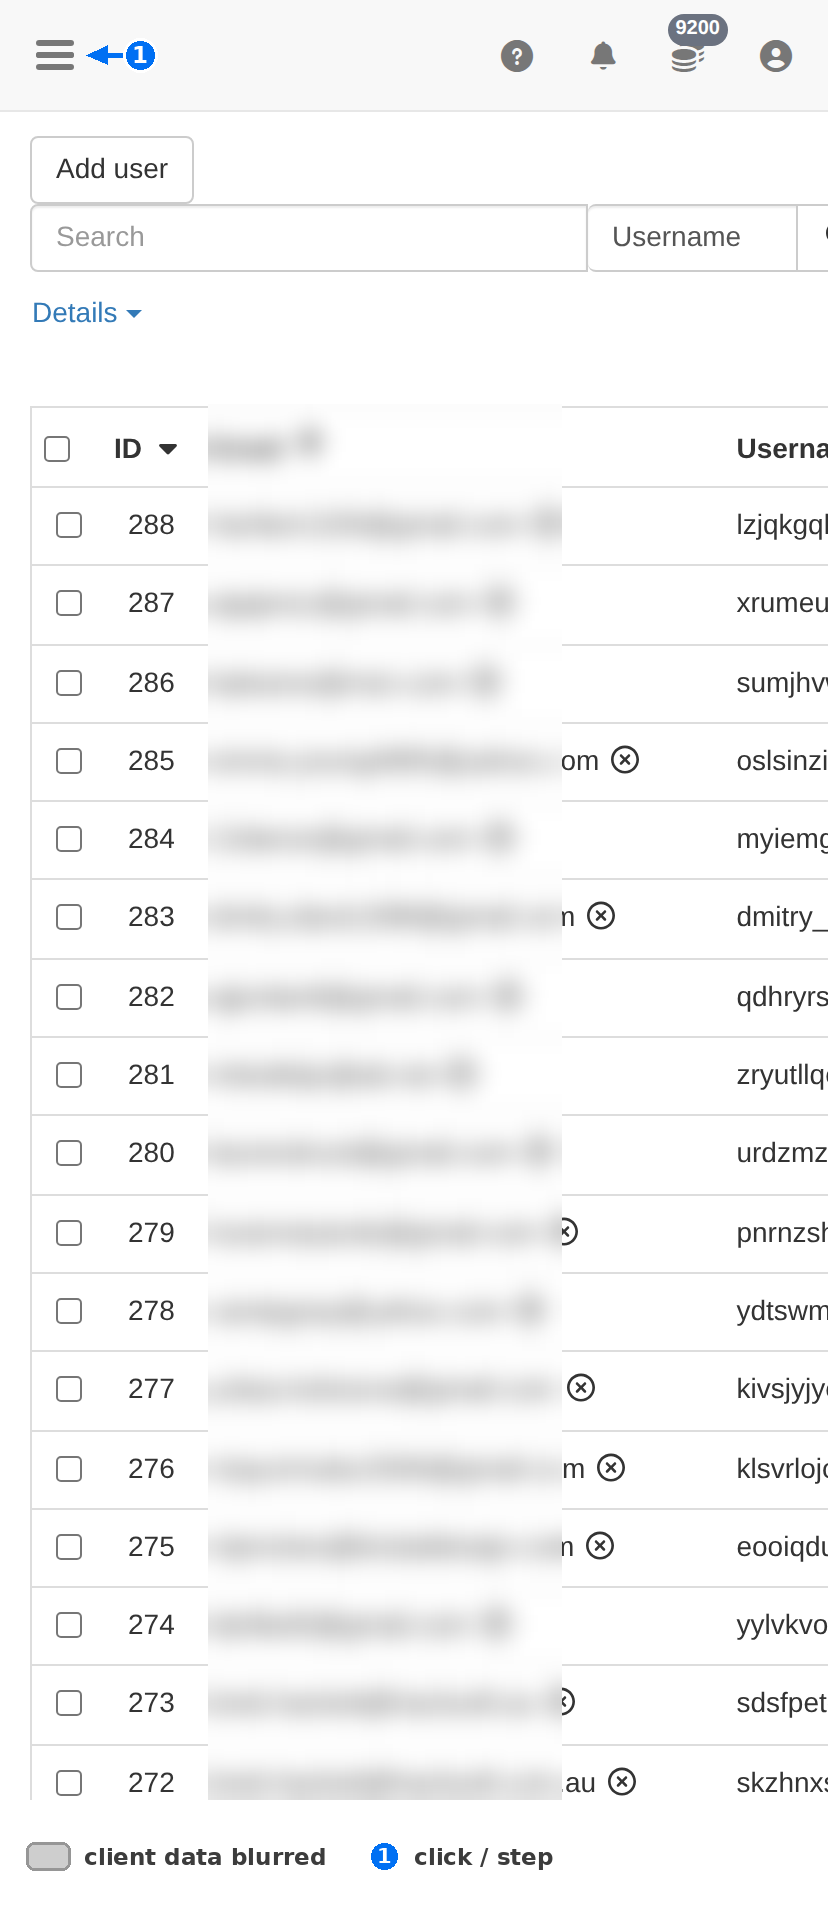
On a narrow screen prefer search by ID over scrolling: it jumps straight to the client without any horizontal swiping.
Troubleshooting
A client is missing from the list
- Check the status filter — an active filter is the most common cause.
- Search by ID if you have it, otherwise switch the field selector to Email or Username.
- Remember the list is paginated: the newest clients are on page 1, sorted by ID descending.
The client cannot log in
- Look at the Status column: a Suspended account is refused at login.
- Otherwise use Set password and hand over the new one.
- Still failing? Check the address in Edit user — a typo in the domain is the usual reason a reset mail never arrives.
The confirmation mail never arrives
- Ask the client to check spam and the promotions tab.
- Verify the address is correct in Edit user.
- In a hurry, switch Email Verified on and press Update.
Balance looks wrong
- Check the Details panel for the totals — Negative Balance and Zero Balance tell you whether the problem is one client or a pattern.
- For a single client, use Edit user to correct the account state, or credit them through Payments so the transaction is recorded.
Too many fake signups
- Open the status filter and look at the Unconfirmed count — fake accounts rarely confirm.
- Search the list, tick the offenders and use bulk Suspend; suspension is reversible, so it is the safe first move.